Product Link:
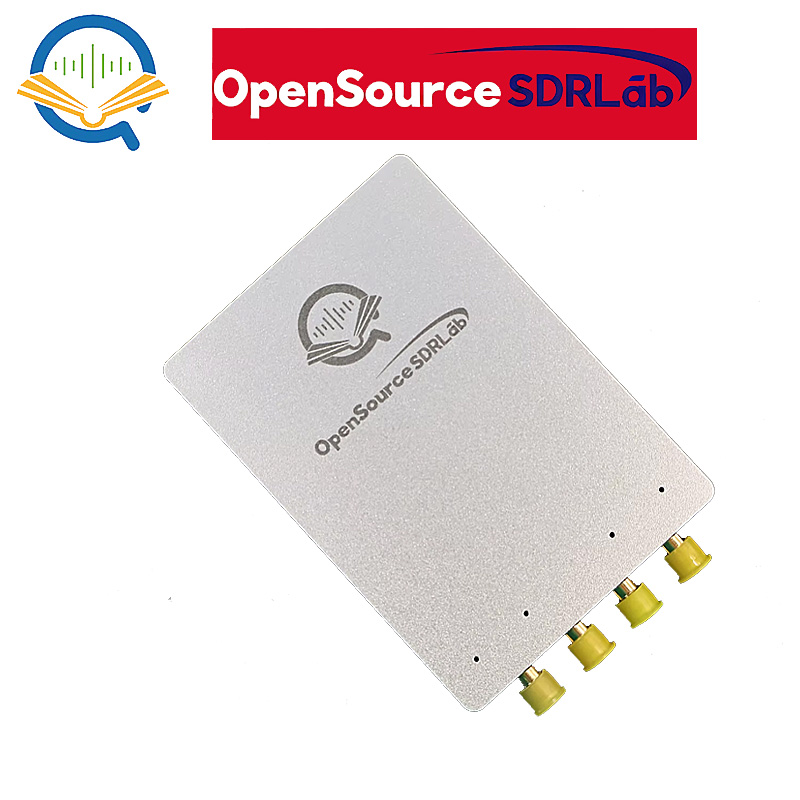
This guide walks through the complete receive-port setup of the USRP B210: deploying the missing UHD image files, verifying device enumeration, configuring the gqrx backend and Device string, selecting and switching between the four on-board SMA ports, verifying reception, and finally configuring single-channel and simultaneous dual-channel reception in GNU Radio, with full hands-on demonstrations.
Overview
We elaborate from eight perspectives.
• Root cause of the GUI failing to enumerate the device while the command line works
• UHD image file deployment (offline copy and online download)
• Device enumeration verification
• gqrx backend selection and Device string configuration
• Selecting and switching between the four on-board SMA receive ports
• Reception verification
• GNU Radio single-channel reception parameters
• GNU Radio simultaneous dual-channel reception
Chapter 1 Root Cause of the Port-Selection Problem
Explains why everything looks normal on the command line while the GUI shows nothing, and why moving only the Antenna dropdown can never reach the other two ports. These two points are the premise for every step that follows.
1.1 Missing UHD Image Files
gqrx and GNU Radio use the UHD 4.8 bundled with radioconda, whose share\uhd\images directory does not exist at all, so neither program can enumerate the device. The uhd_usrp_probe you ran by hand, however, uses the 4.10 installed under C:\Program Files\UHD, and that one does have the images — hence the illusion that "everything is fine on the command line but the GUI shows nothing".
1.2 The Antenna Dropdown Cannot Reach the Other Channel
The Antenna dropdown in gqrx only switches between the two SMA ports of the current channel. To switch to the other channel you must write subdev into the device string. Moving the dropdown alone will never reach the other two ports.
Chapter 2 UHD Image File Deployment
Deploy the image files missing from the UHD bundled with radioconda. This is the first step that lets gqrx and GNU Radio enumerate the device. Either of the two options below is sufficient.
2.1 Option A · Copy from an Existing Installation
Option A · Copy from the installation you already have (fast, works offline). Open PowerShell, paste the two commands below and press Enter.
Step 1 Create the folder
New-Item -ItemType Directory -Force "$env:USERPROFILE\radioconda\Library\share\uhd\images"
Step 2 Copy the images
Copy-Item "C:\Program Files\UHD\share\uhd\images\*" -Destination "$env:USERPROFILE\radioconda\Library\share\uhd\images\" -Recurse
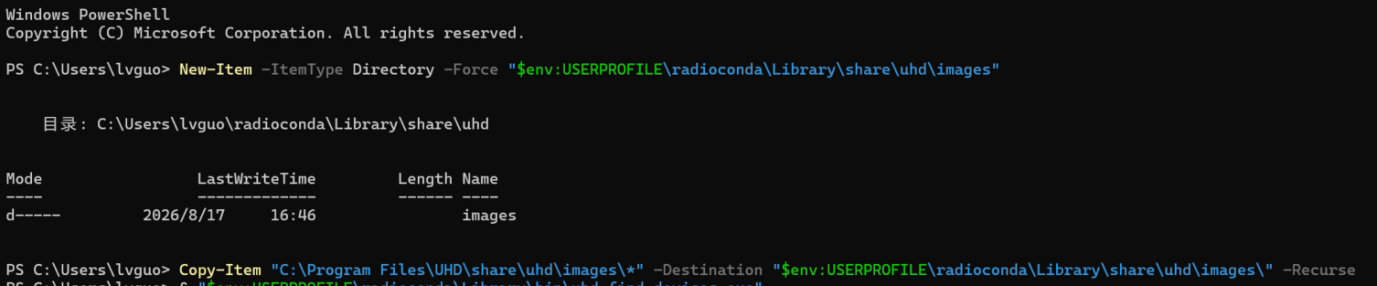
Note: copying across versions (4.10 images used by 4.8) works in this case because both versions require the same FW 8.0 / FPGA 16.0 compatibility numbers, and no warning at all appeared in testing. This is a coincidence rather than a general rule, so check the compatibility numbers before changing the version combination.
2.2 Option B · Download Automatically
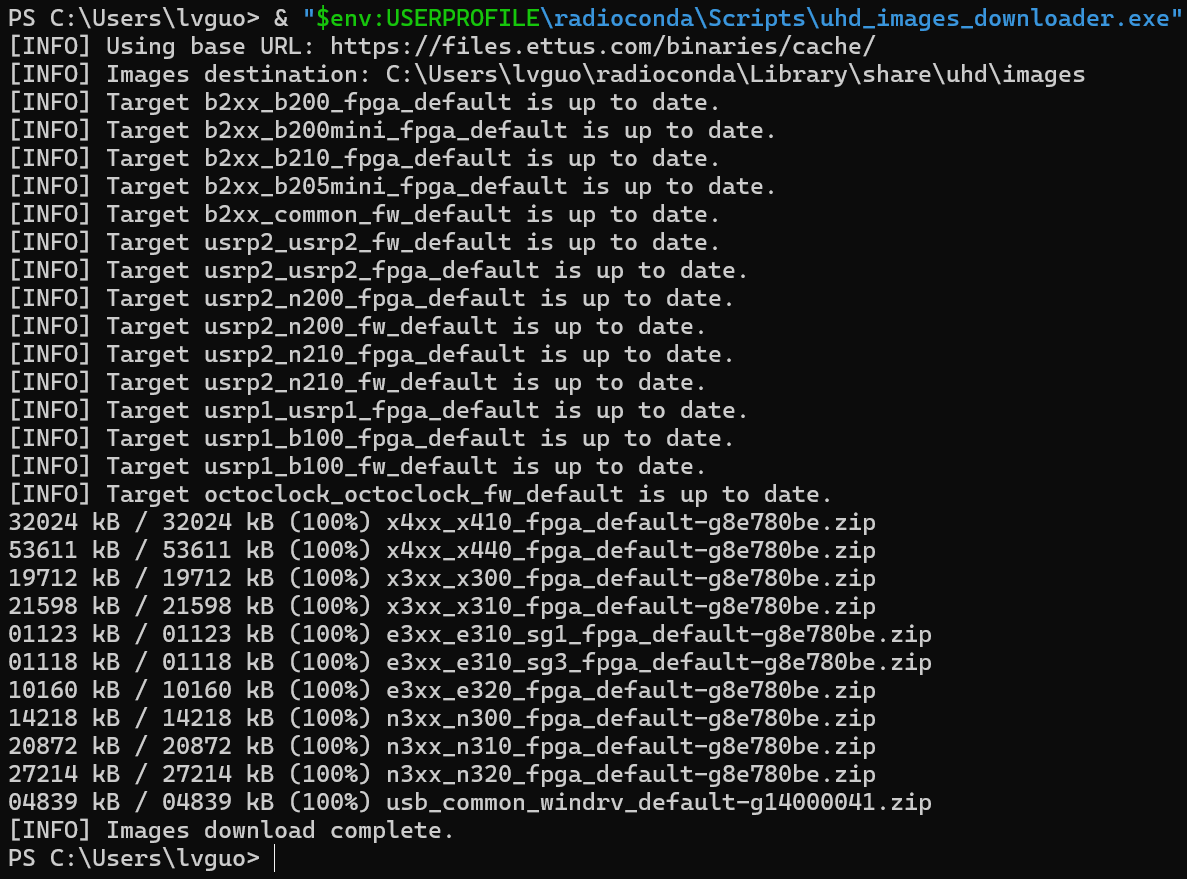
Option B · Let it download by itself (strict version match, requires an internet connection). Run the command below and UHD will fetch the images that strictly match the current version.
& "$env:USERPROFILE\radioconda\Scripts\uhd_images_downloader.exe"
Chapter 3 Device Enumeration Verification
Once the images are in place, confirm that the radioconda copy of UHD can enumerate the B210 before moving on to the gqrx configuration.
3.1 Run uhd_find_devices
Step 1 Run the command
Now paste this line into PowerShell and press Enter.
& "$env:USERPROFILE\radioconda\Library\bin\uhd_find_devices.exe"
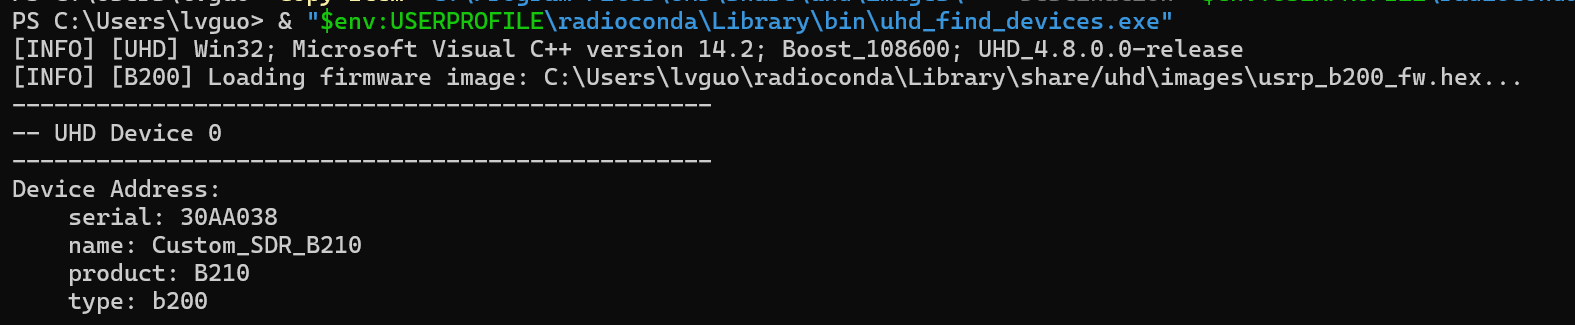
Step 2 Read the result
Output like the following means success;
Chapter 4 gqrx I/O Device Configuration
The gqrx backend selection, Device string and sampling parameters must be set strictly in order. Complete the eight steps in this section from top to bottom.
4.1 Configuration Sequence
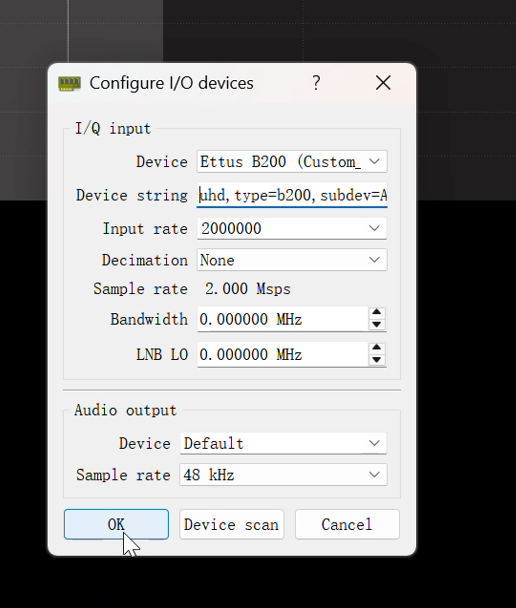
Follow this exact order; if the order is wrong the settings do not take effect.
Step 1 Open I/O Devices
Open gqrx and click the menu File → I/O Devices.
Step 2 Select the backend
In the Device dropdown select Ettus B200 (Custom_SDR_B210) 30AA038. Note: do not select the B210 30AA038 entry.
When the wrong backend is selected the subdev parameter is silently ignored, which shows up as "no matter what I change, only one channel works".
Step 3 Fill in the Device string
In the Device string field, select everything already there and delete it, then type the following line by hand (no spaces before or after):
uhd,type=b200,subdev=A:B
Step 4 Set Input rate
Set Input rate to 2000000.
Step 5 Set Decimation and Bandwidth
Set Decimation to None and leave Bandwidth at 0.
Step 6 Leave the backend alone from here on
From this point on, do not touch the Device dropdown again; one click on it undoes Step 3.
Step 7 Confirm
Click OK.
Step 8 Restart gqrx
Close gqrx completely, then open it again.
Chapter 5 Selecting the Receive Port
The board has four SMA ports in total. Which one is active is decided jointly by the subdev in the Device string and by the Antenna dropdown; both must be right, either one alone is not enough.
5.1 Where the Antenna Dropdown Is
On the right-hand side of the gqrx main window, the Input controls tab, the Antenna dropdown at the very bottom.
Fill in according to the table below. Both the Device string and the Antenna must be right; either one alone is not enough.
5.2 Port Mapping Table
5.3 Switching Ports Later
To change ports later, check which of the two cases applies:
Only one line at a time in the Device string field. gqrx is a single-channel program and can open only one channel at a time; pasting both device strings in will crash it outright.
Chapter 6 Reception Verification
Connect the antenna as configured above and use the waterfall to judge success;
6.1 Verify Reception
Step 1 Start receiving
Click the ▶ button at the top-left of the main window to start receiving.
Step 2 Connect the antenna
Plug the antenna into the port selected in Chapter 5.
Step 3 Watch the waterfall
Observe the waterfall display: a distinct signal rather than a flat noise floor shall be visible; clear audio can be heard after connecting to the corresponding port.
Step 4 Adjust the volume
Only after you see the signal, adjust the volume and listen.
A signal on the waterfall = the whole setup is complete.
Chapter 7 GNU Radio Single-Channel Reception
GNU Radio receives through the UHD: USRP Source block. For single-channel reception the subdev and antenna combinations are exactly the same as in the table in 5.2.
7.1 UHD: USRP Source Parameters
Use the UHD: USRP Source block, double-click to open its properties, and fill in according to the table below.
Chapter 8 GNU Radio Dual-Channel Reception
gqrx does not support dual channels; receiving on two ports at once is only possible in GNU Radio. This chapter gives the full parameters for both tabs of the UHD: USRP Source block, plus the channel-to-port mapping.
8.1 General Tab
8.2 RF Options Tab
After Num Channels is changed to 2, a whole set of Ch1: fields appears on this page.
8.3 Channel-to-Port Mapping
8.4 Pass Criteria
The dual-channel function is judged normal when the port the antenna is plugged into corresponds one-to-one with the spectrum plot in which the signal appears, and when the two signal strengths swap over as the antenna is moved from one port to the other.
Conclusion
Congratulations! You have completed the entire receive-port setup of the B210. You have deployed the UHD image files, verified device enumeration, and mastered gqrx backend selection and Device string configuration; you can now switch accurately between the four SMA ports on the board, and perform both single-channel and simultaneous dual-channel reception in GNU Radio.
Key points: subdev decides the channel and Antenna decides which SMA port on that channel, so the two must always be set as a pair; after changing subdev you must close gqrx completely and reopen it; and only one line at a time is allowed in the Device string field.