GeekRF One User Manual
Set up the GeekRF One 2T2R SDR on Windows and Ubuntu: drivers, IIO Oscilloscope, GNU Radio, SDR#, SDRangel, a TF card boot image and on-board flash firmware.

Introduction
GeekRF One is a software-defined radio of the OpenSourceSDRLab PlutoSky series. It transmits and receives from 70 MHz to 6 GHz with 2 transmit and 2 receive channels in full duplex, and adds Gigabit Ethernet and a TF card slot. The design is derived from the Analog Devices ADALM-PLUTO and improves it in the following ways:
- Antennas: 2×2 MIMO
- Network: Gigabit Ethernet, supported by the ZED + FMCOMMS3 port
- Clock accuracy: 0.5 ppm TCXO, VCTCXO supported
- Storage: TF card slot
Note: Use the device in accordance with your local laws and regulations.
Main Features
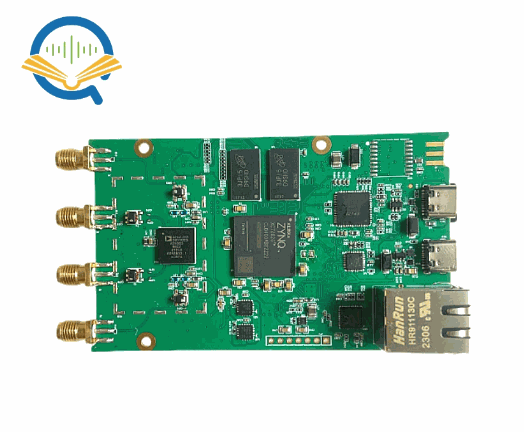
Fig. 1 The GeekRF One
The GeekRF One has four RF channels: 2 for transmit and 2 for receive. It has two USB Type-C connectors, one for OTG and one for the serial console, and a Gigabit Ethernet connector. The specifications are shown in the following pictures.
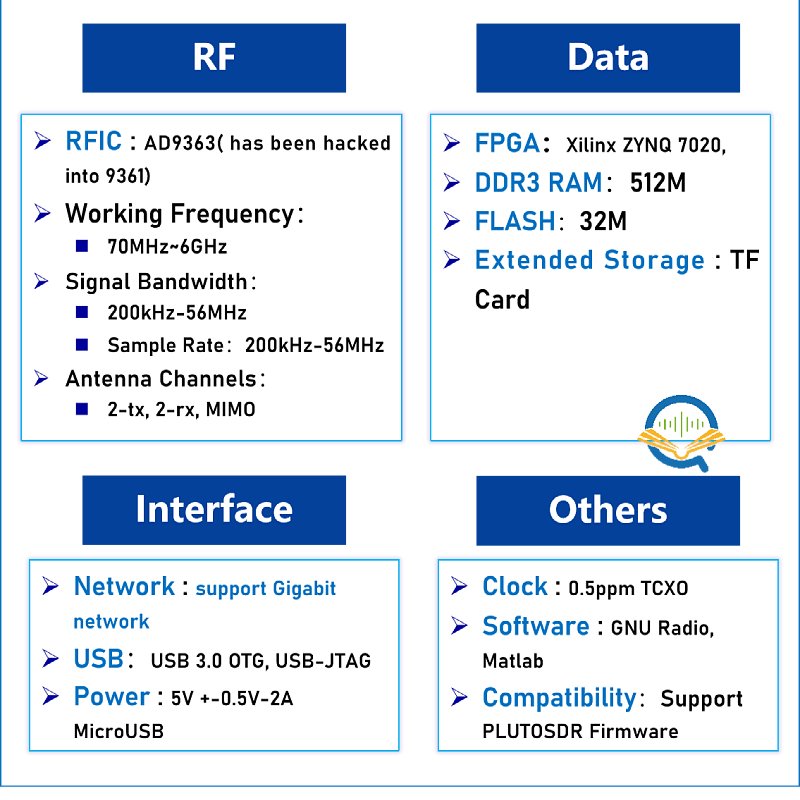
Fig. 2 GeekRF One hardware and interfaces
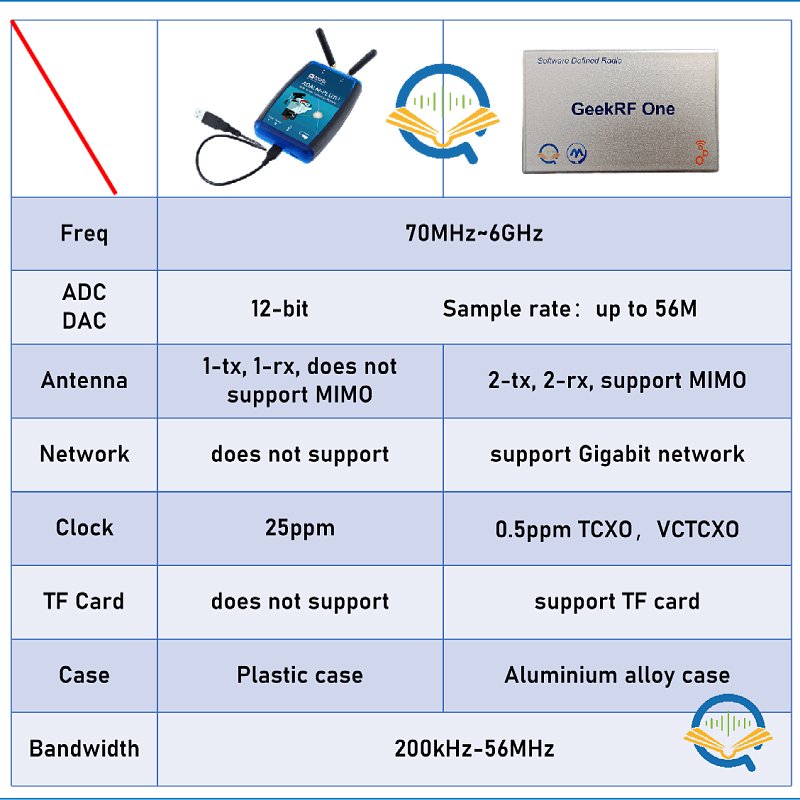
Fig. 3 GeekRF One specifications compared with the ADALM-PLUTO
Firmware and Downloads
The firmware files used in this manual are published on GitHub and in the OpenSourceSDRLab download center:
- GitHub (firmware, Quick Start Guide, SHA-256 checksums): https://github.com/OpenSourceSDRLab/GeekRF-One
- Download center: https://www.opensourcesdrlab.cn/en/download.html#p=geekrf-one
| File | Contents |
|---|---|
GeekRF-One_TF-card-boot-files.zip | BOOT.BIN and image.ub for the TF card system (and uImage, the Linux kernel alone, which the steps in this manual do not need) |
GeekRF-One_flash-firmware_v0.37.zip | the burn_flash folder, the PlutoSDR firmware v0.37 (plutosdr-fw-v0.37) and UPDATE.BAT for the on-board flash |
Technical Support and Community
If you have a question about the GeekRF One, contact OpenSourceSDRLab through any of these channels:
- Email: support@opensourcesdrlab.com
- Forum: https://forum.opensourcesdrlab.com
- Discord: https://discord.gg/nnxY6DkmvT
- Blog and user manuals: https://blog.opensourcesdrlab.com
When you ask for help, please tell us how the device is connected (OTG port, or Serial port and Ethernet), whether it boots from the TF card or from the on-board flash, and the software you use.
Windows Tutorials
Windows version: Windows 11 64-bit or Windows 10 64-bit
Hardware: GeekRF One
Software:
- Analog Devices IIO Oscilloscope
- GNU Radio
- SDR# (SDRSharp)
- SDRangel
The GeekRF One has also been tested with MATLAB R2024a.
Device Connection Methods
Before installing and testing the software, connect the device to the computer. There are two ways to do this: with a network cable and a USB Type-C cable, or with a USB Type-C cable only.
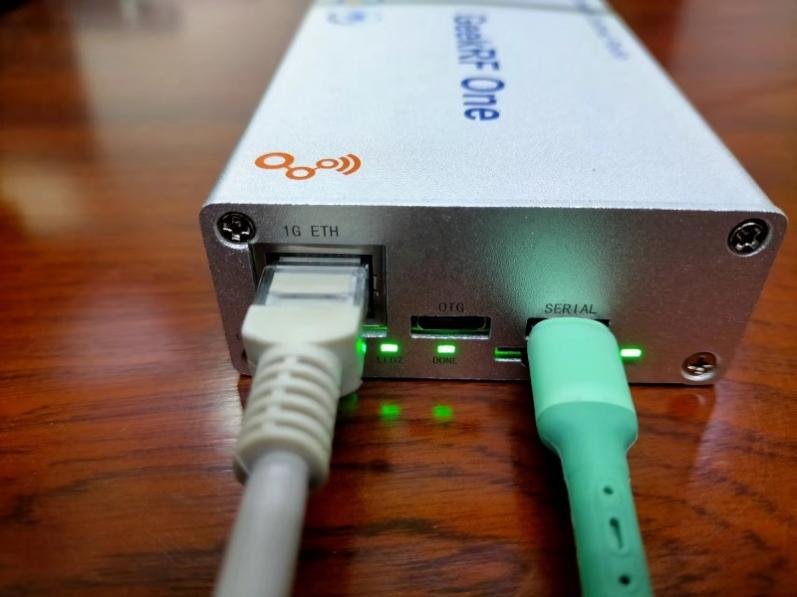
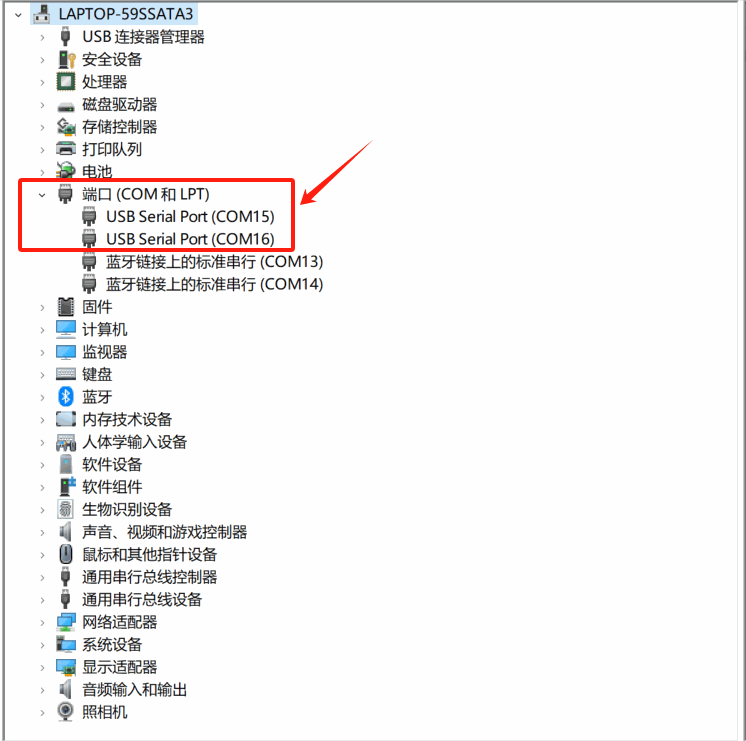
Method 1: network cable and USB cable. Connect the GeekRF One to the computer with a Gigabit Ethernet cable, and connect a USB Type-C cable to the Serial connector. With this method the computer finds the GeekRF One faster than with method 2. In Device Manager (right-click This PC › Manage › Device Manager › Ports (COM & LPT)), two new COM ports named USB Serial Port appear; they belong to the GeekRF One.
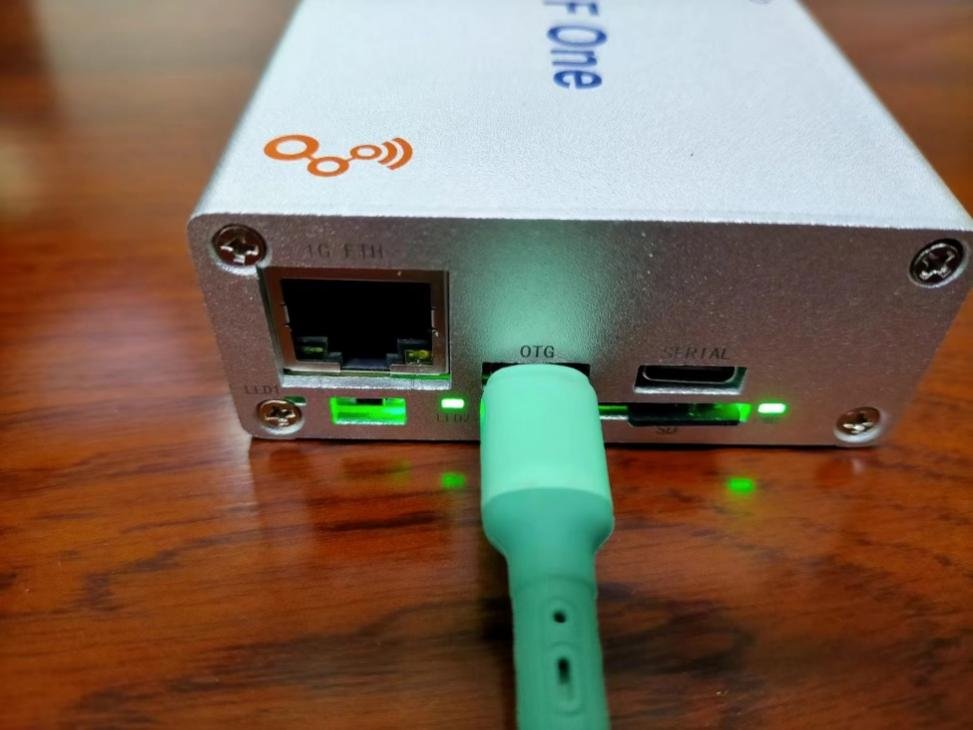
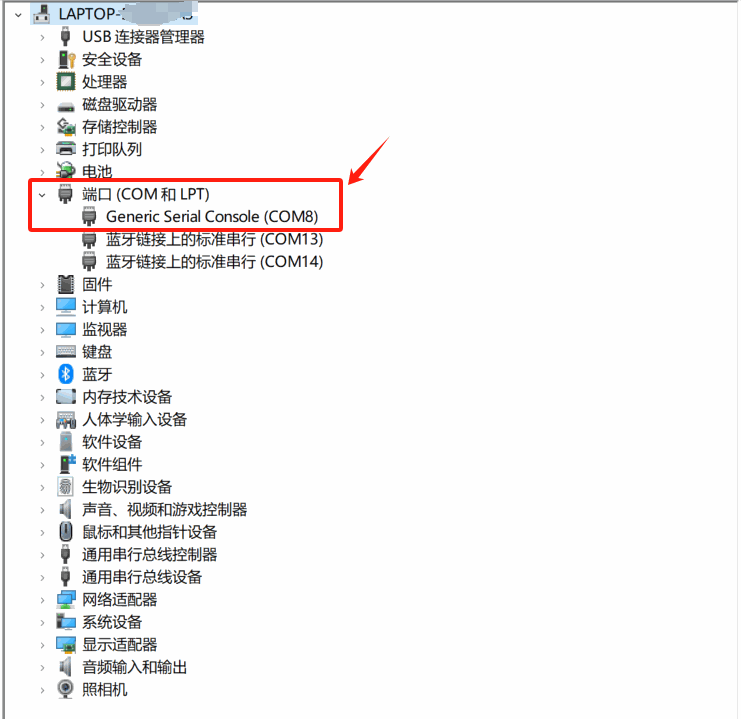
Method 2: USB cable only. Connect one USB Type-C cable to the OTG connector. The computer needs about 10–20 seconds to find the GeekRF One. In Device Manager, one new COM port named Generic Serial Console appears.
PlutoSDR Driver Installation
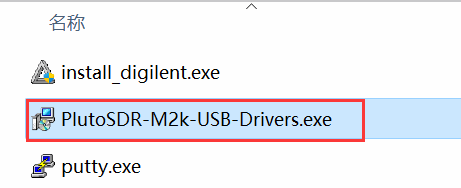
Install the Analog Devices PlutoSDR USB drivers for Windows (PlutoSDR-M2k-USB-Drivers.exe), available from Analog Devices: https://github.com/analogdevicesinc/plutosdr-m2k-drivers-win/releases
PuTTY Installation and Test
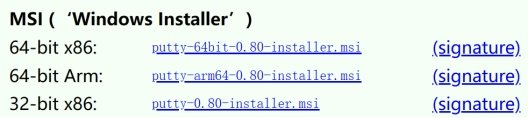
Download and install PuTTY: https://www.chiark.greenend.org.uk/~sgtatham/putty/latest.html
Connect the GeekRF One to the computer as described in Device Connection Methods.
With method 1 (network cable and USB cable to the Serial port), open the second of the two new COM ports in PuTTY (COM16 in this example). Your port number may be different; check it in Device Manager.
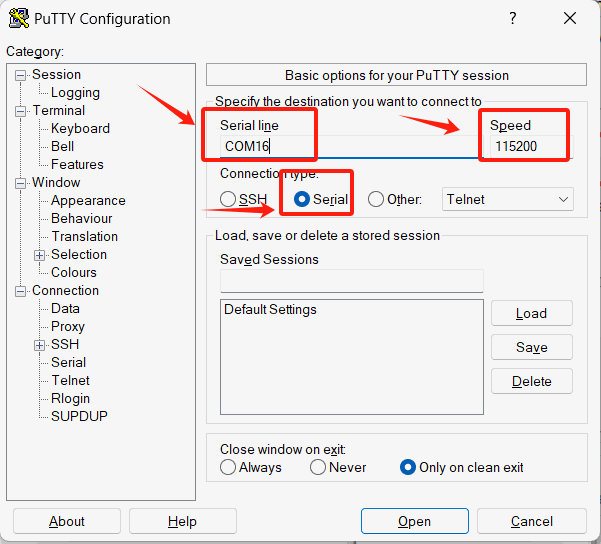
With method 2 (one USB cable to the OTG port), open the Generic Serial Console port (COM8 in this example).
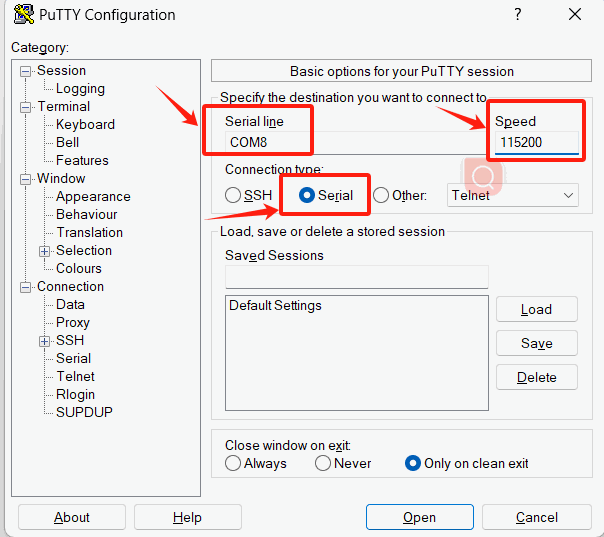
Click Open. A terminal window opens:
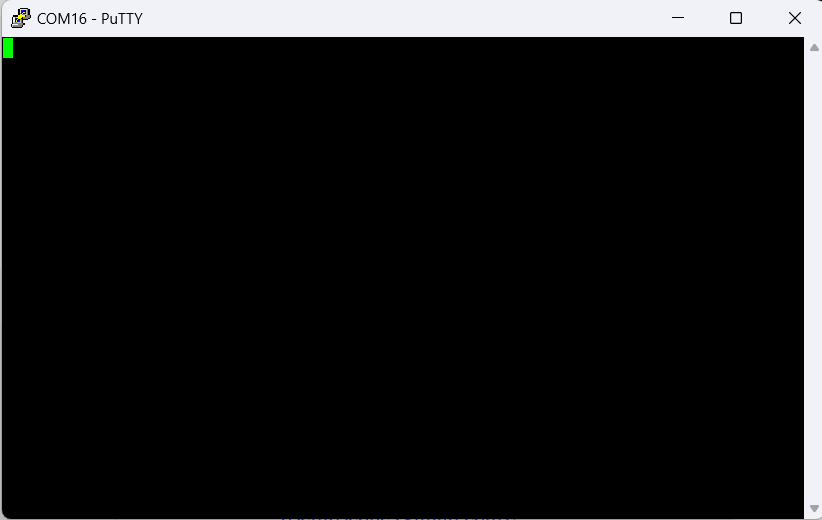
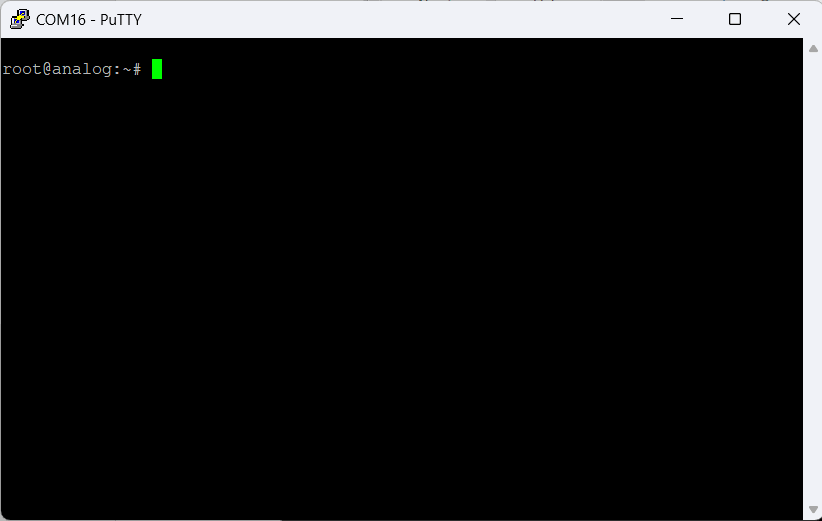
Press Enter once to get the login prompt:
IIO Oscilloscope Installation and Test
Download IIO Oscilloscope from Analog Devices: https://github.com/analogdevicesinc/iio-oscilloscope/releases
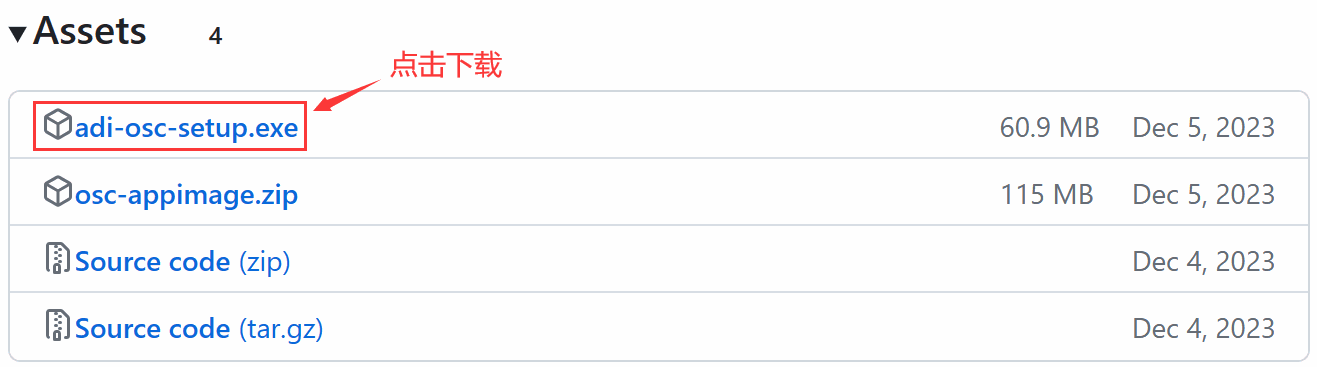
After installation, double-click the IIO Oscilloscope shortcut to open it.
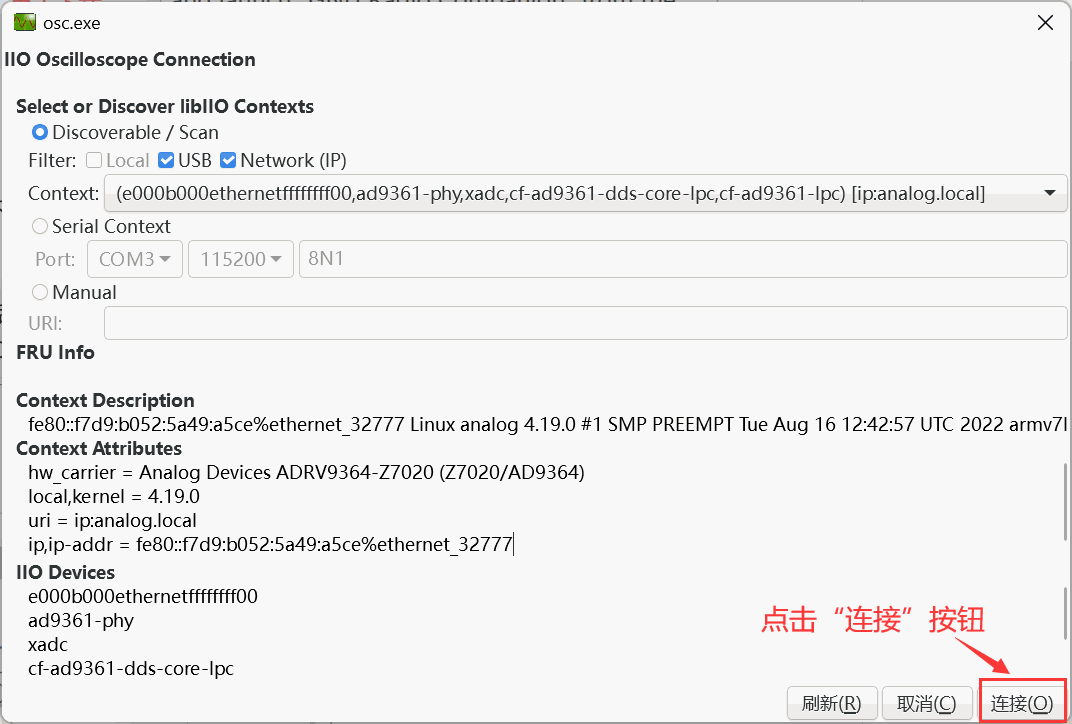
If the GeekRF One is connected with method 1 (Ethernet and a USB cable to the Serial port), IIO Oscilloscope opens the connection dialog (if it does not, click Settings › Connect). It scans for devices and shows the information of the device it finds. Click Connect to open the main window.
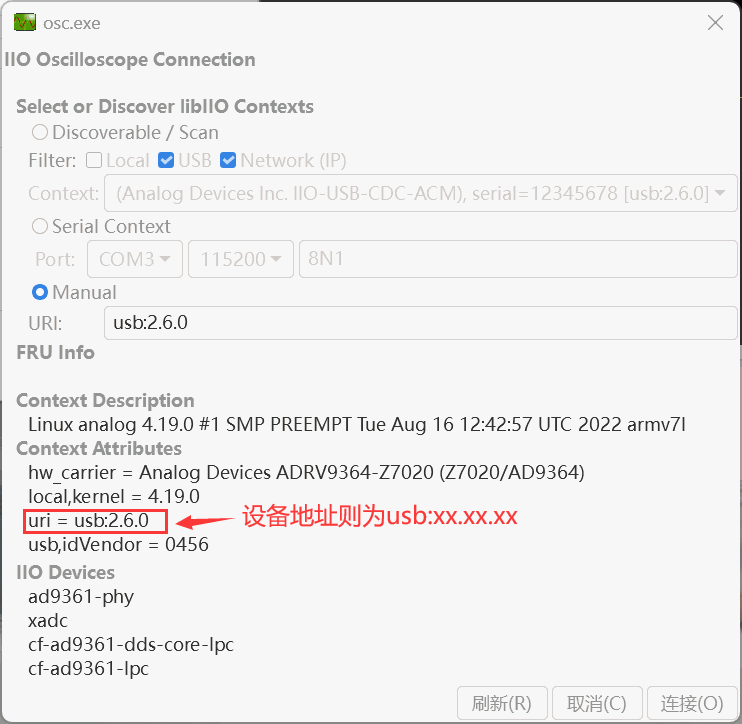
With method 2 (one USB cable to the OTG port), the dialog finds the device in the same way; note that the device address is different from the Ethernet connection.
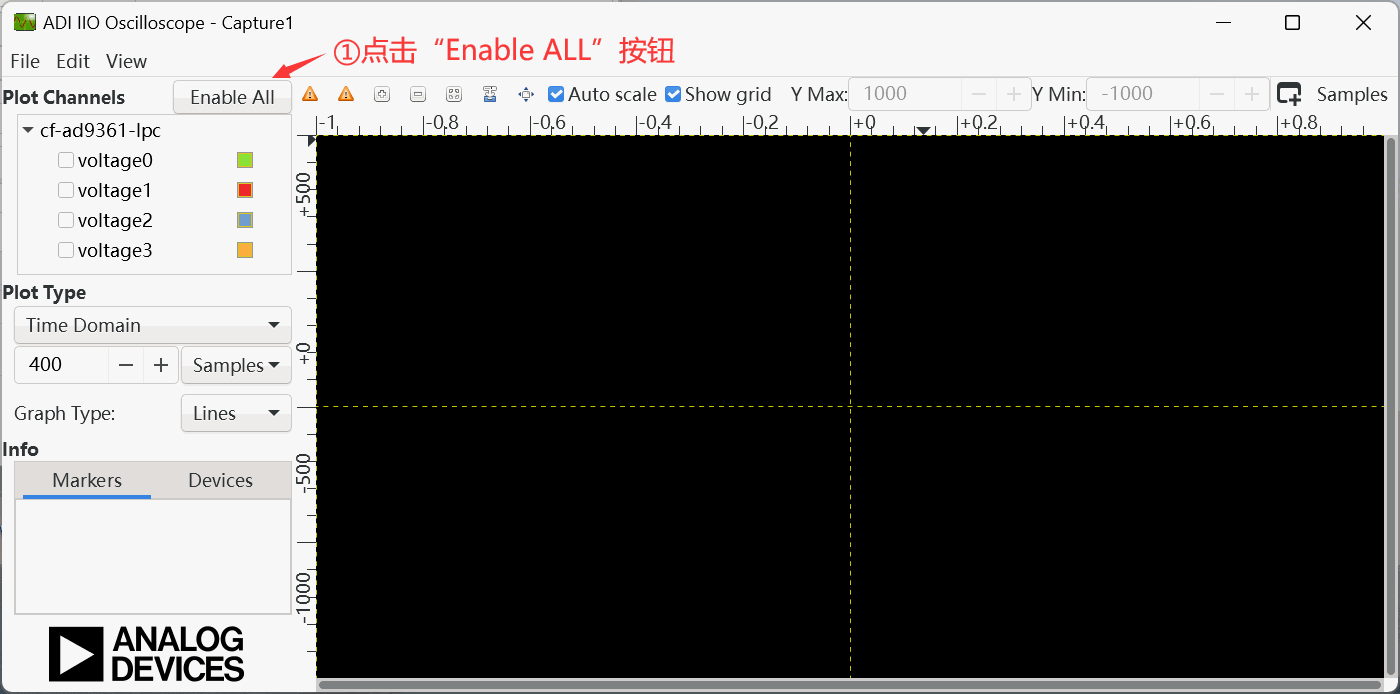
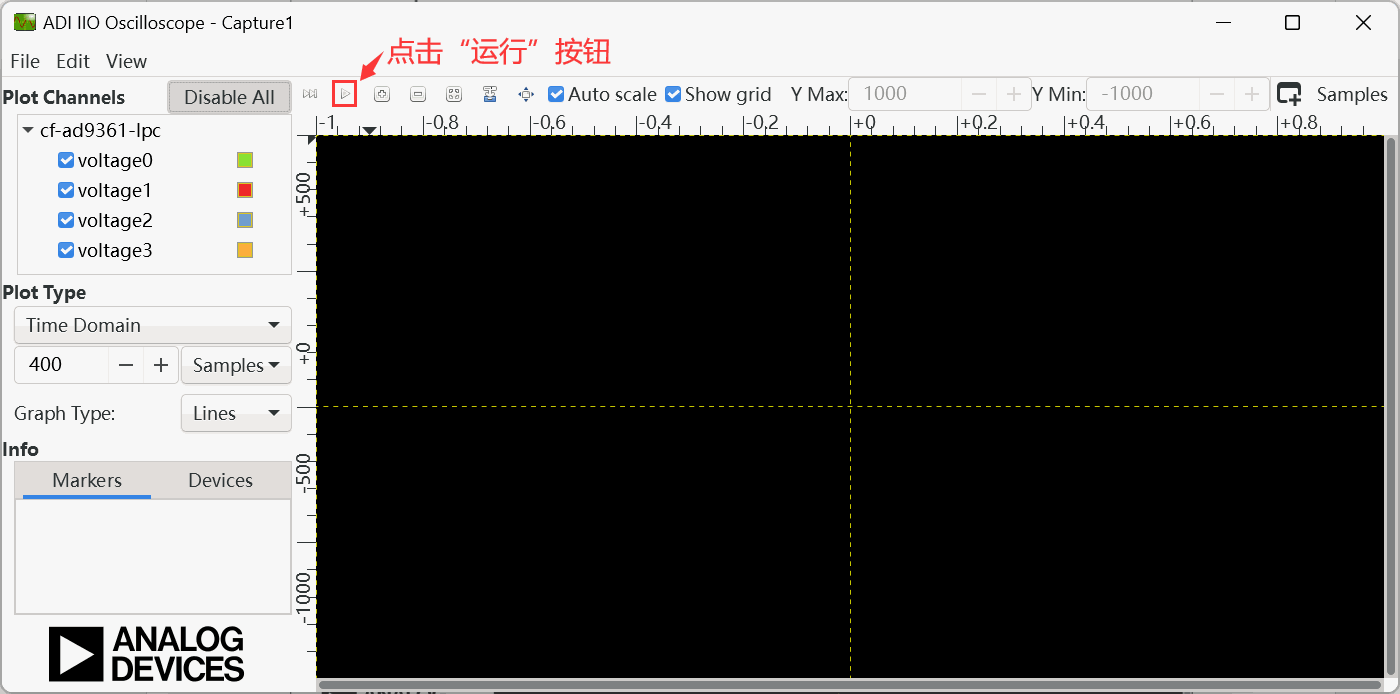
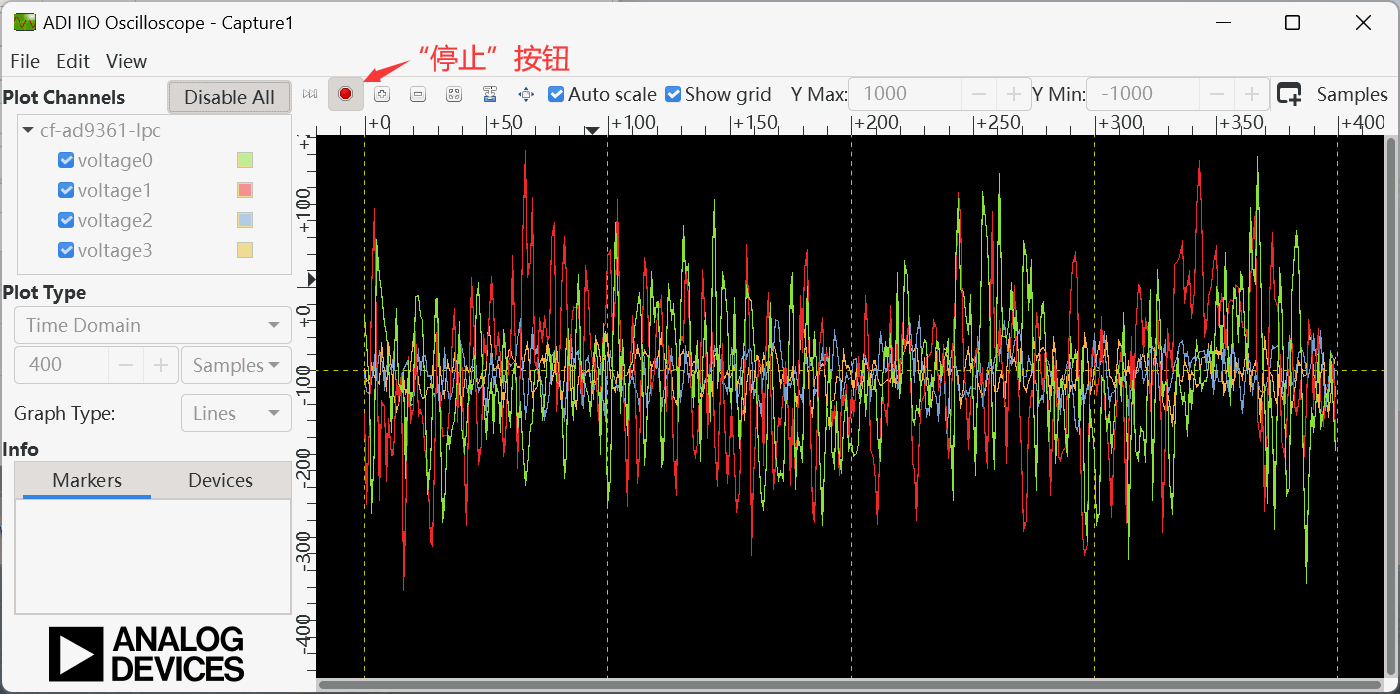
Then follow the steps in the next figures until the oscilloscope shows the time-domain waveform. This shows that the GeekRF One communicates with the computer and the data transfer works.
GNU Radio Installation and Test
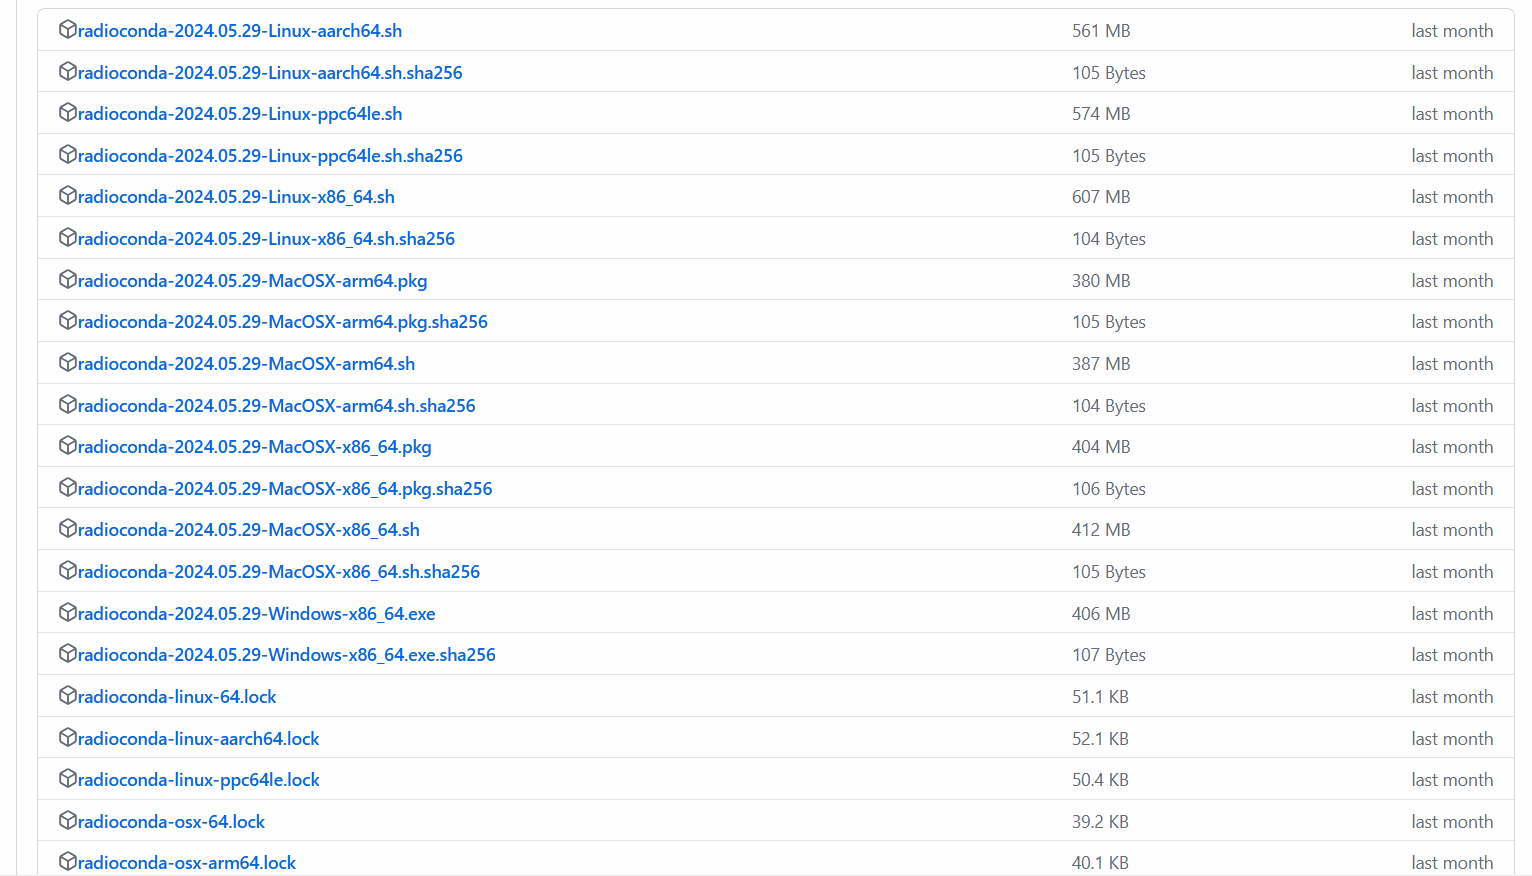
Download GNU Radio (radioconda) and choose the installer for your operating system: https://github.com/ryanvolz/radioconda/releases/tag/2024.05.29
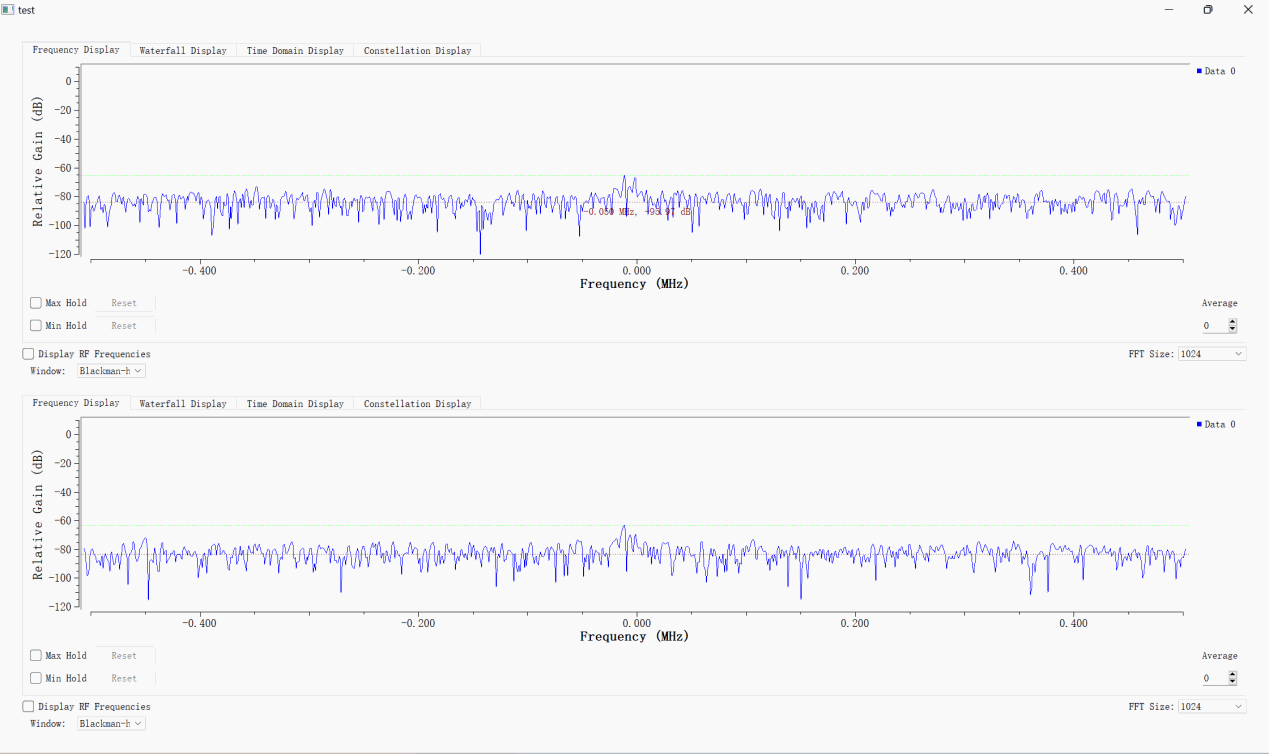
Build the following flowgraph in GNU Radio Companion. It is a basic receive test: set the receive frequency and connect the FMComms2/3/4 Source block to the two QT GUI Sink blocks.
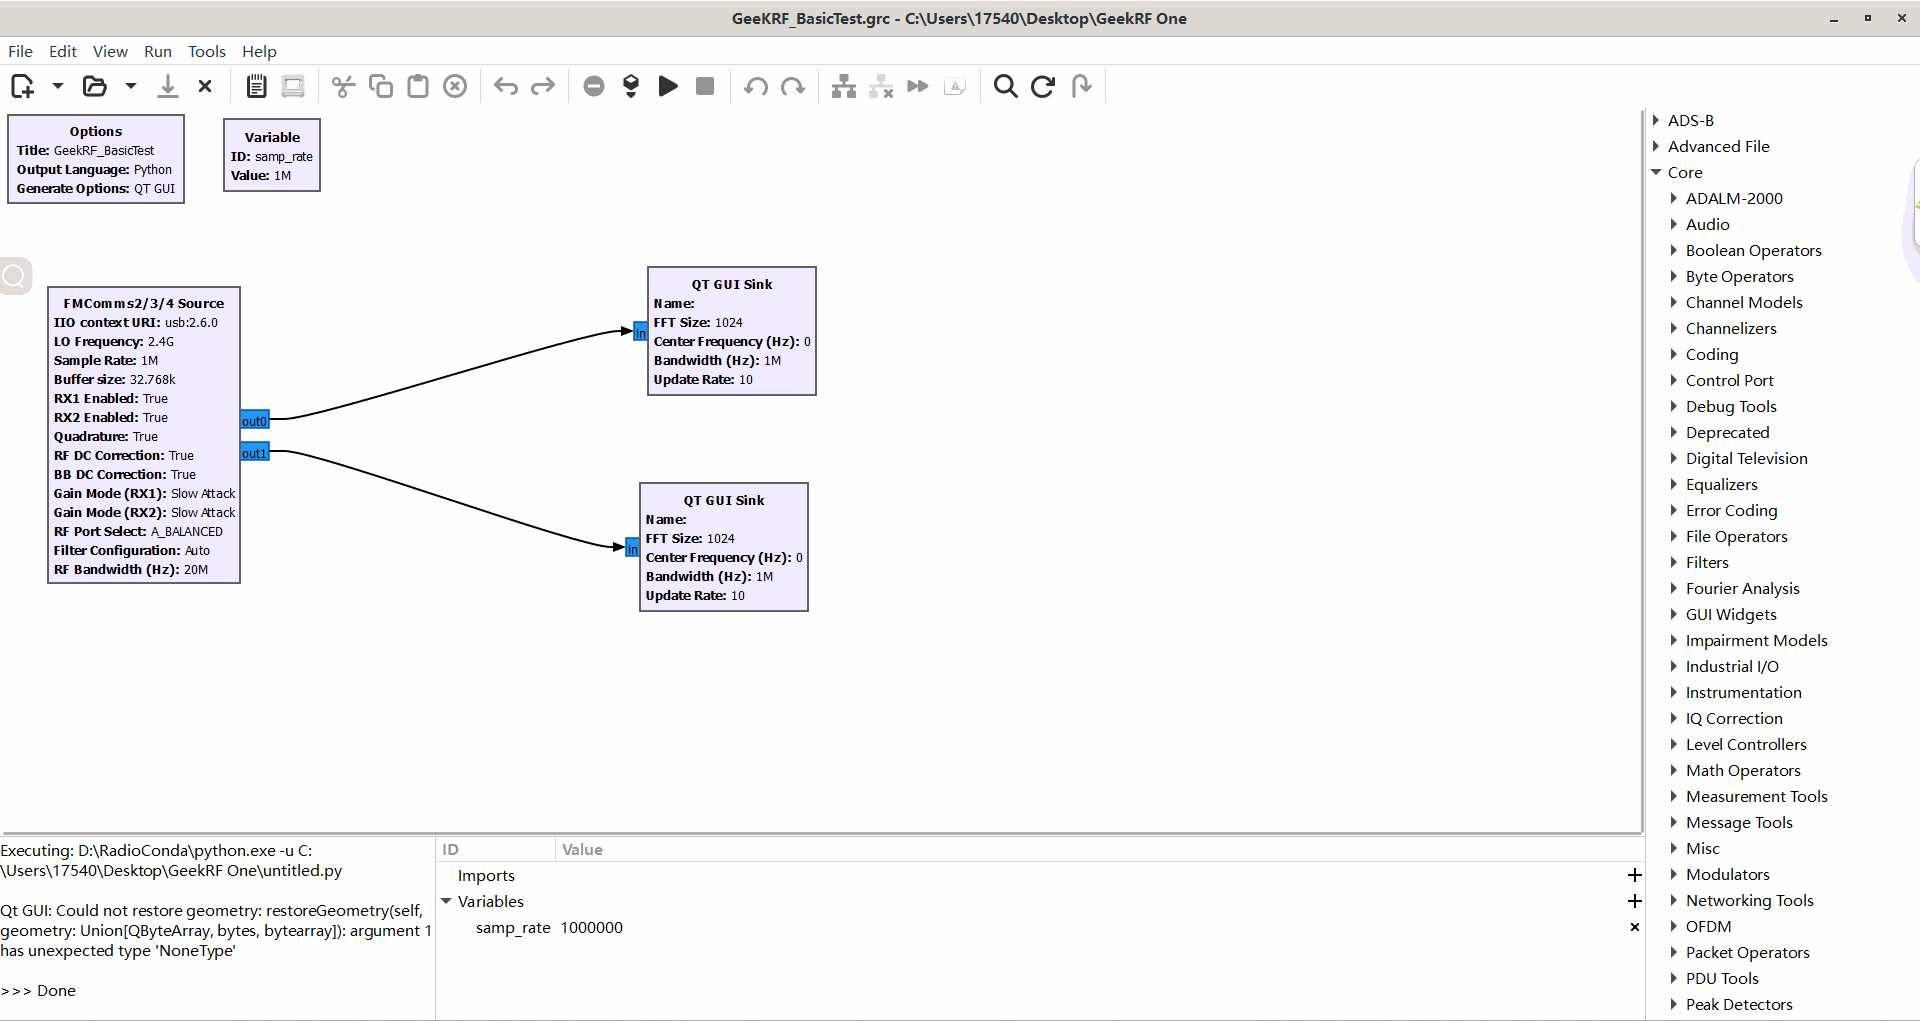
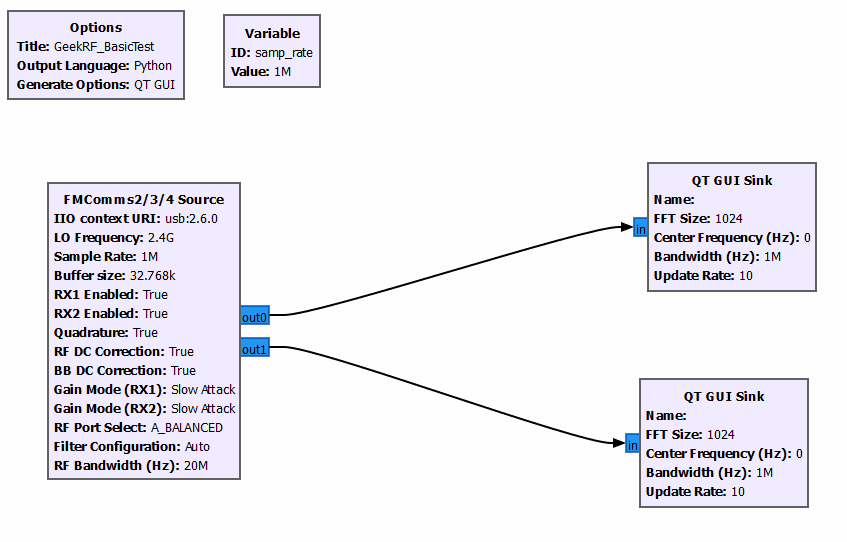
Click Generate to create the Python code, then click Run. The received signal is displayed.
Notes:
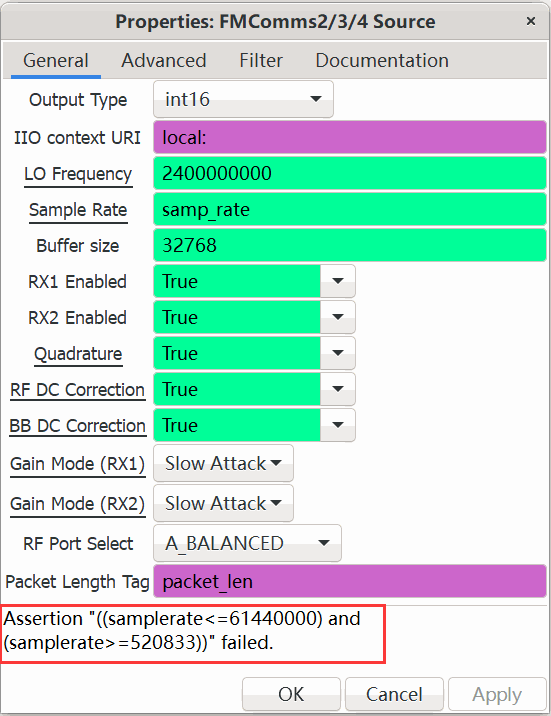
- The sample rate must be between 520833 and 61440000; other values cause an error when the flowgraph runs.
- If the GeekRF One is connected with one USB cable (OTG port), the IIO context URI is
usb:x.x.x.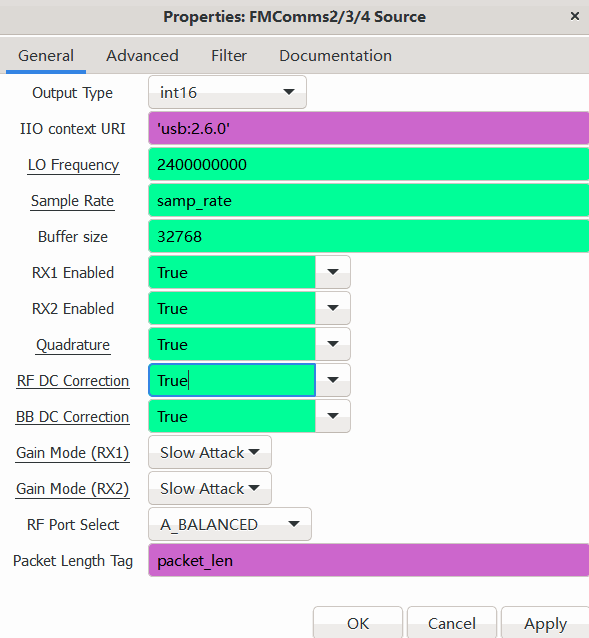
- If the device is connected through Ethernet and one USB cable (Serial port), the IIO context URI is by default a dynamic address in the form
ip:analog.local.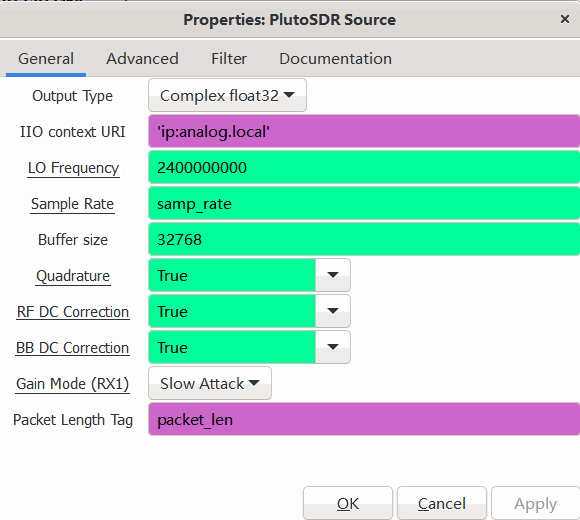
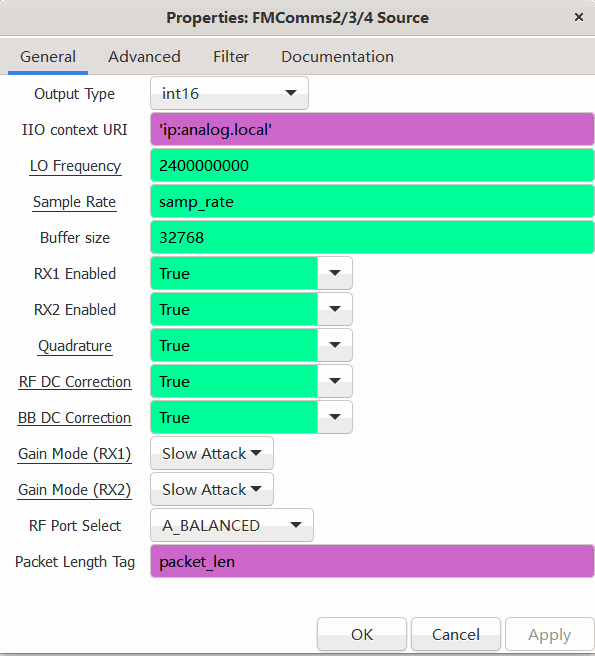
- Do not leave out the quotation marks when you enter the IIO context URI.
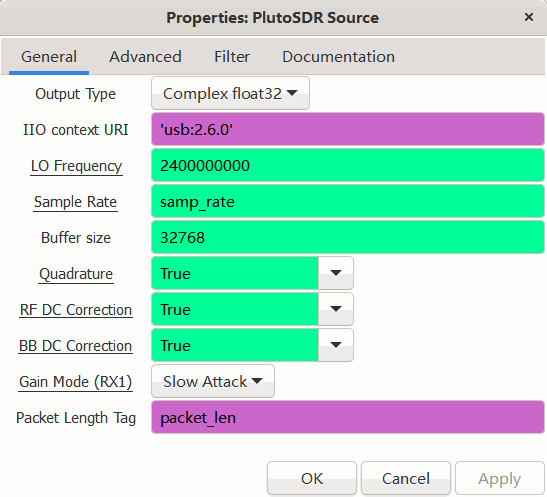
- The FMComms2/3/4 Source block can be replaced by the PlutoSDR Source block, with the same settings. The PlutoSDR Source block uses only one channel of the device; everything else works the same. Likewise, the FMComms2/3/4 Sink block can be replaced by the PlutoSDR Sink block.
Create a TF Card Boot Image
Note: the TF card shipped with the device has already been prepared and tested, so you do not need to make it yourself. This section explains how to do it if you need a new card.
1. Install Win32 Disk Imager
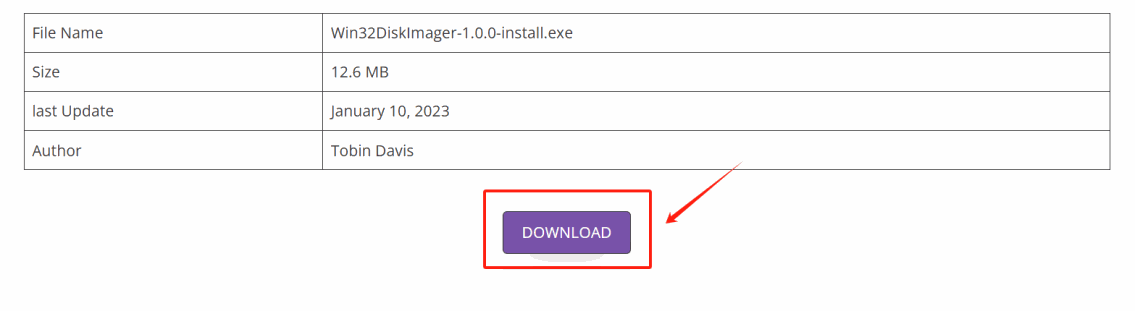
Download and install Win32 Disk Imager: https://win32diskimager.org/
2. Download the Kuiper Linux image
Download the latest Analog Devices Kuiper Linux release: https://wiki.analog.com/resources/tools-software/linux-software/adi-kuiper_images/release_notes
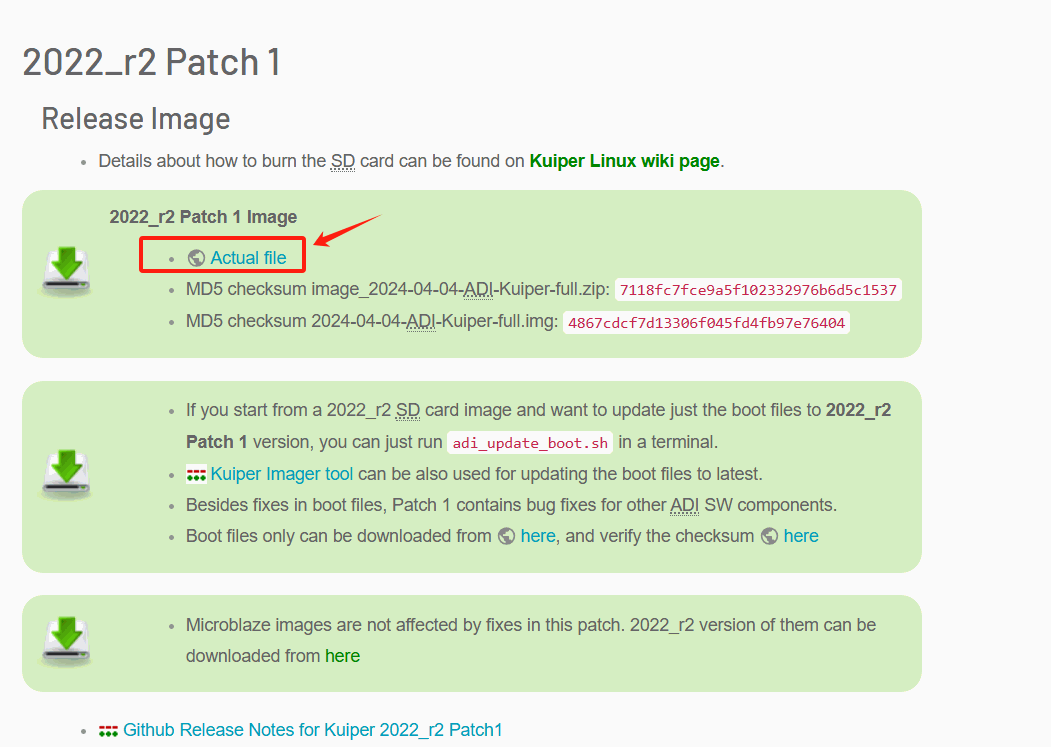
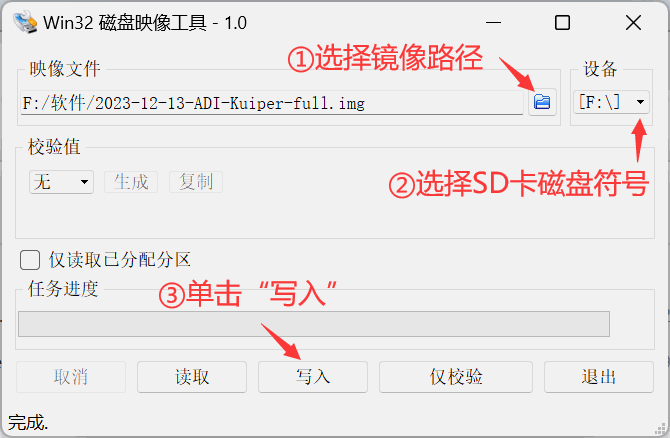
Open Win32 Disk Imager and follow the steps shown in the figure:
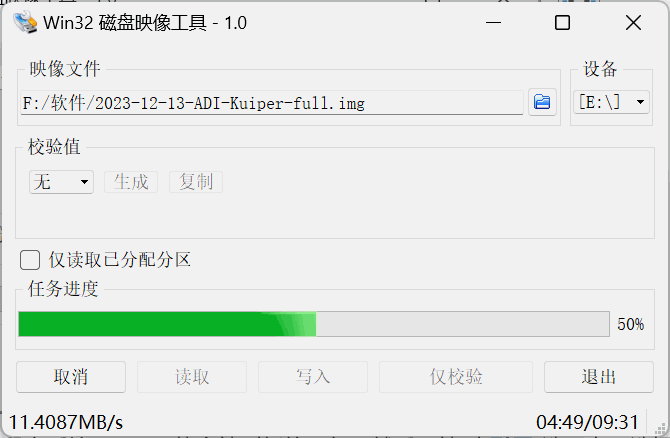
Wait while the image is written to the TF card. This usually takes 10 to 15 minutes, depending on the card.
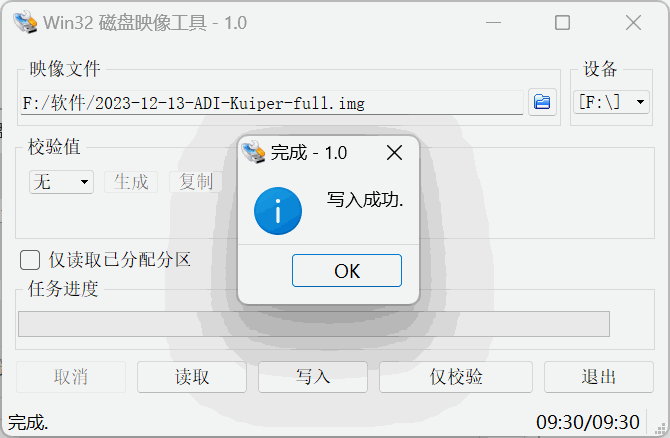
When the Write Successful dialog appears, the image has been written.
3. Replace the boot files
Unzip GeekRF-One_TF-card-boot-files.zip (see Firmware and Downloads) and copy BOOT.BIN and image.ub to the BOOT drive of the TF card you have just written, replacing the files there.
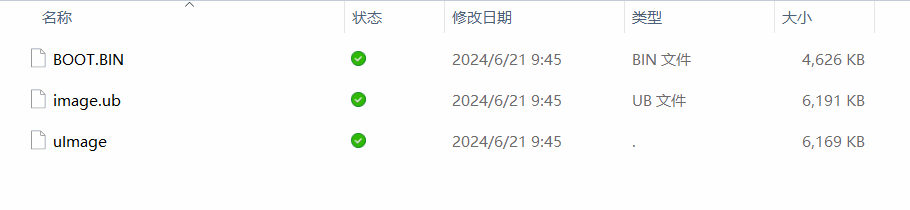
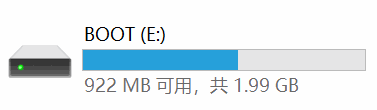
The TF card for the GeekRF One is ready. Insert it into the TF card slot of the device.
Flash the On-board Firmware
With the PlutoSDR firmware in the on-board flash, the GeekRF One works without a TF card. You need a TF card made as described in the previous section.
Caution: step 4 erases the whole on-board flash. Complete all the steps; until the last step is done, the device cannot start from the on-board flash.
- Unzip
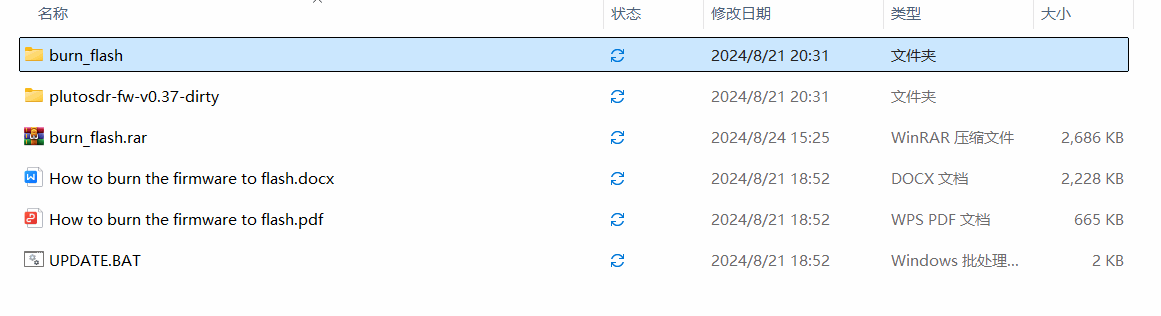
GeekRF-One_flash-firmware_v0.37.zip(see Firmware and Downloads). Connect the TF card to the computer with a card reader and copy theburn_flashfolder to its BOOT drive.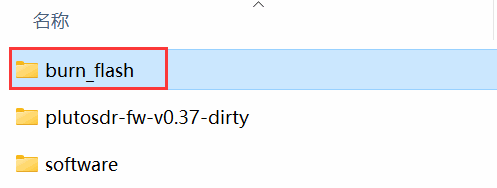
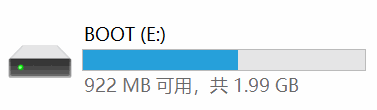
- If the two USB Serial Port entries do not appear in Device Manager, install the Digilent USB driver (
install_digilent.exe, Digilent Inc.). It is included in AMD Vivado and Vivado Lab Edition.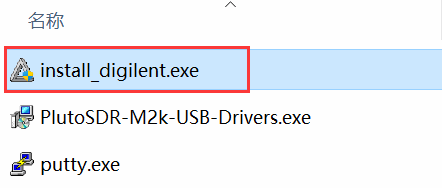
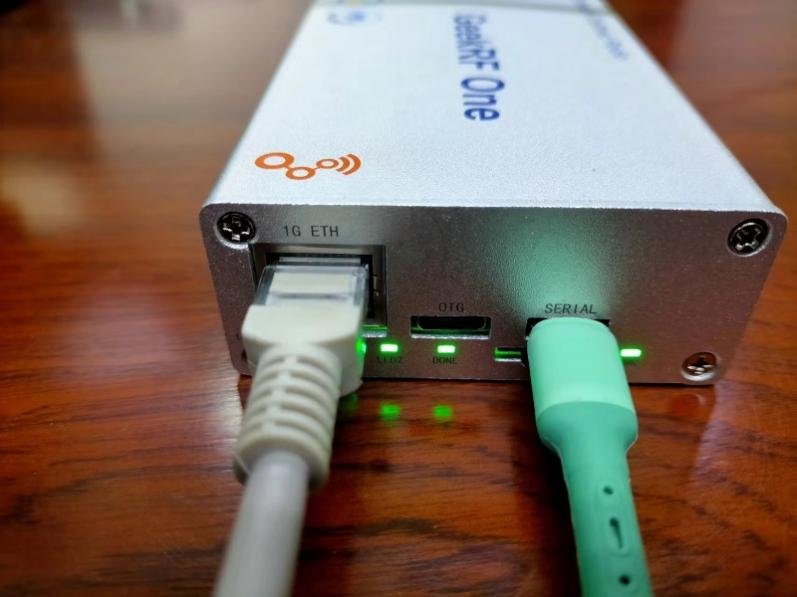
- Insert the TF card into the GeekRF One. Connect the computer to the GeekRF One with a network cable and a USB cable to the Serial port.
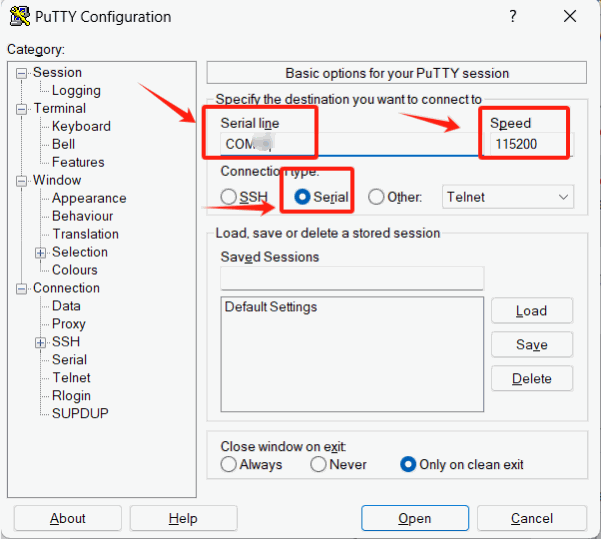
- Open the COM port in PuTTY (speed 115200). Power on the device and press any key before the countdown ends to stop in the U-Boot command line.
Enter the following commands one after the other:
sf probe
sf erase 0x0 0x2000000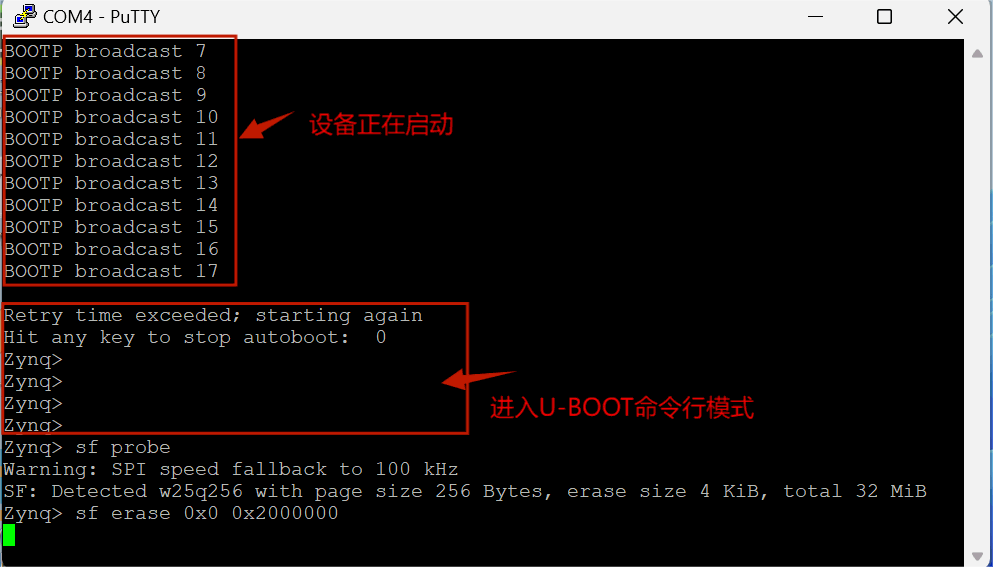
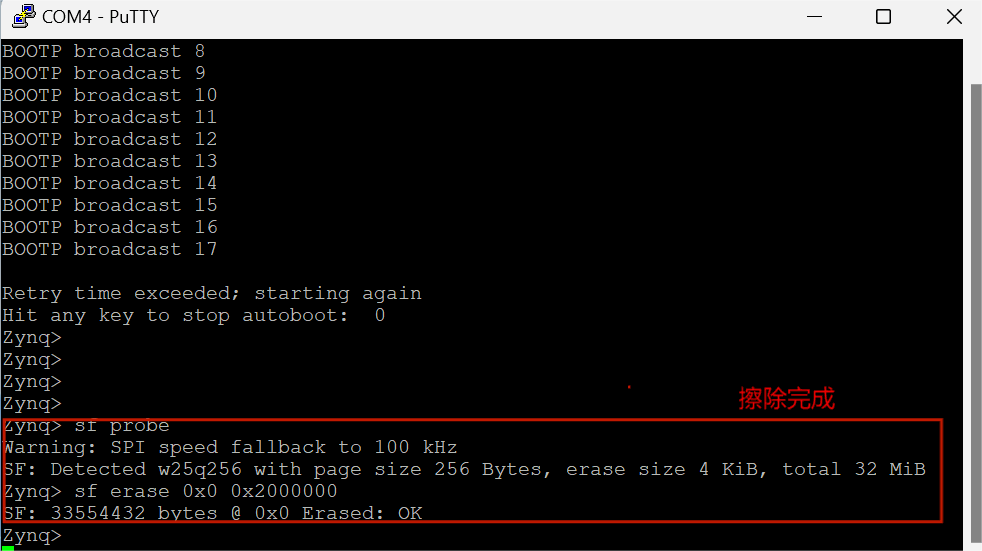
- Power the GeekRF One off and on again (unplug the USB cable and plug it in again).
The system on the TF card starts. When
root@analog:~#appears in PuTTY, enter the following commands one after the other:mount /dev/mmcblk0p1 /mnt cd /mnt/burn_flash chmod +x autoconfig.sh ./autoconfig.sh sudo shutdown -h now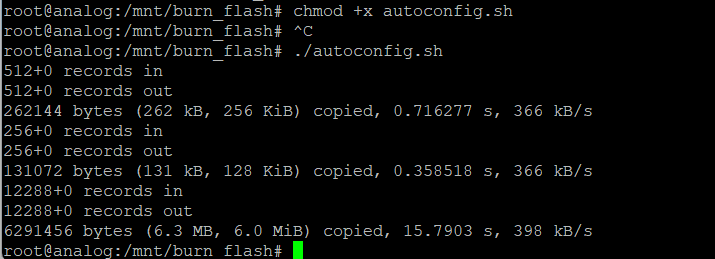
- When the device has shut down, disconnect the USB cable from the Serial port.
- Remove the TF card and connect a USB cable to the OTG port. On the computer, open the unzipped firmware folder (the one that contains
UPDATE.BAT).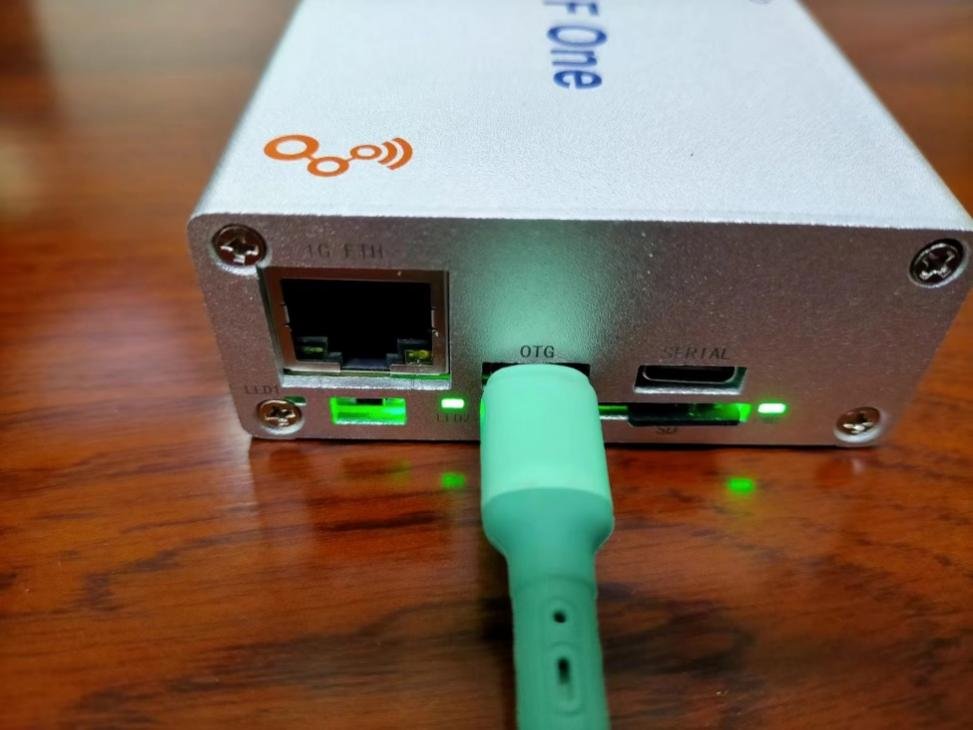
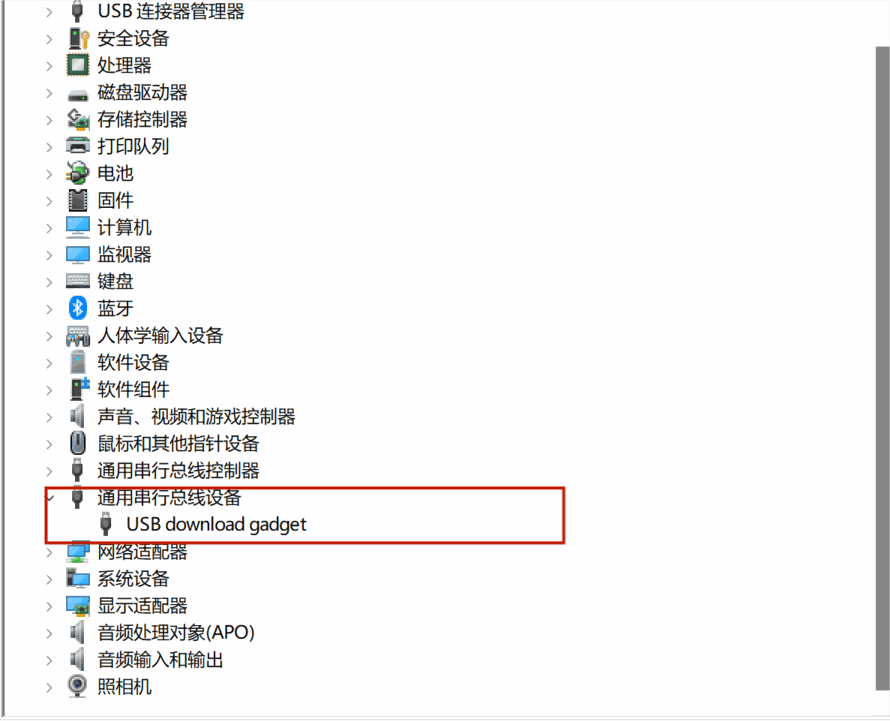
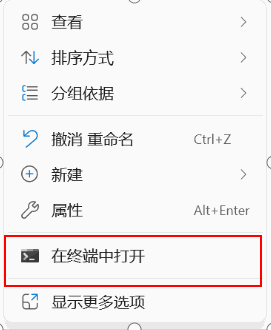
- When USB download gadget appears in Device Manager, right-click an empty area of the folder and click Open in Terminal.
- Enter the following command in the terminal (it needs the PlutoSDR USB drivers from PlutoSDR Driver Installation):
.\UPDATE.BAT .\plutosdr-fw-v0.37\pluto.dfu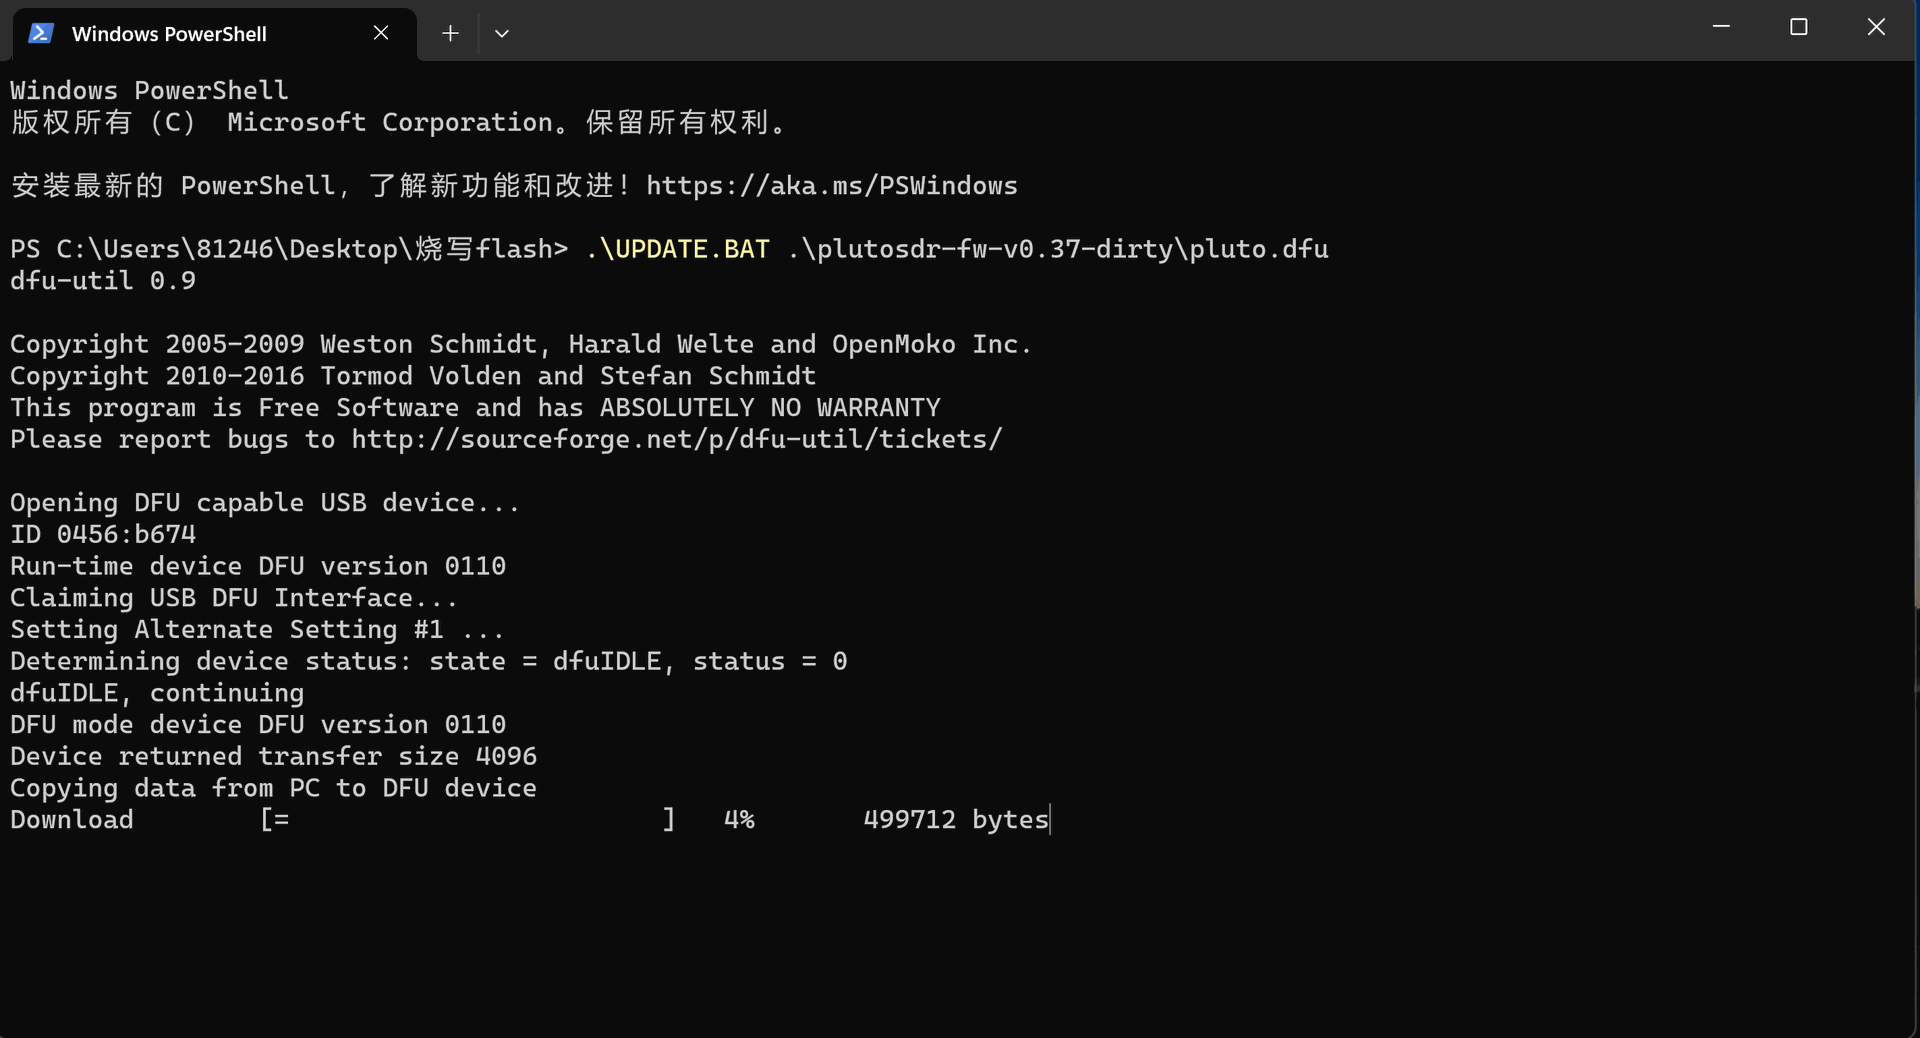
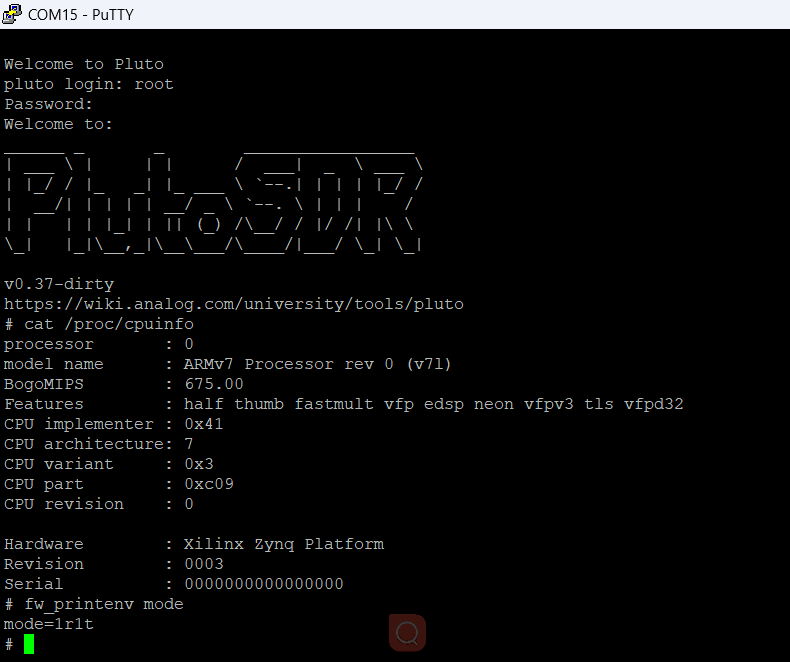
- Wait until the firmware has been written completely, then power the device off and on again. The LED flashes and the GeekRF One now works without a TF card.
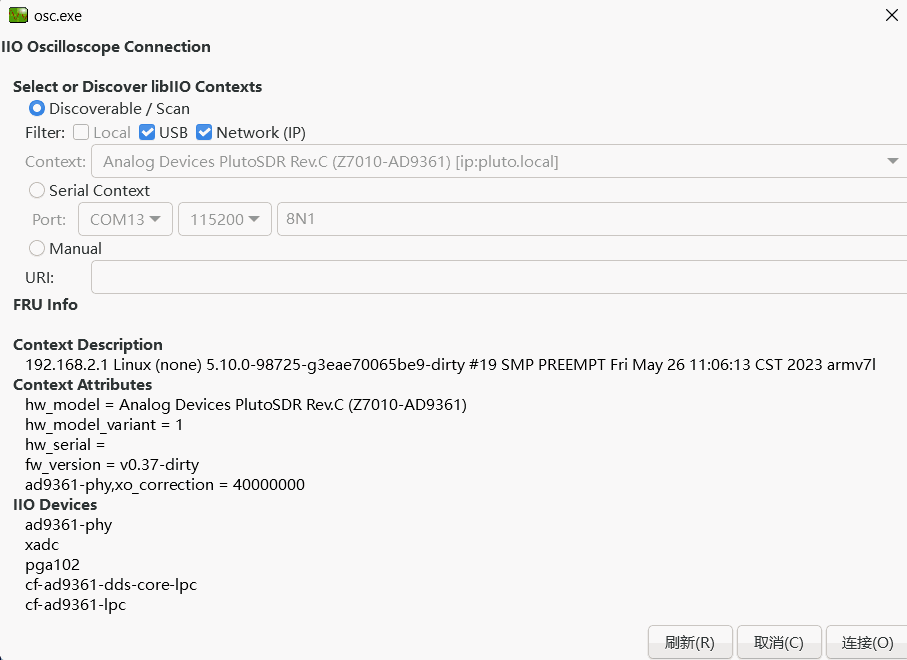
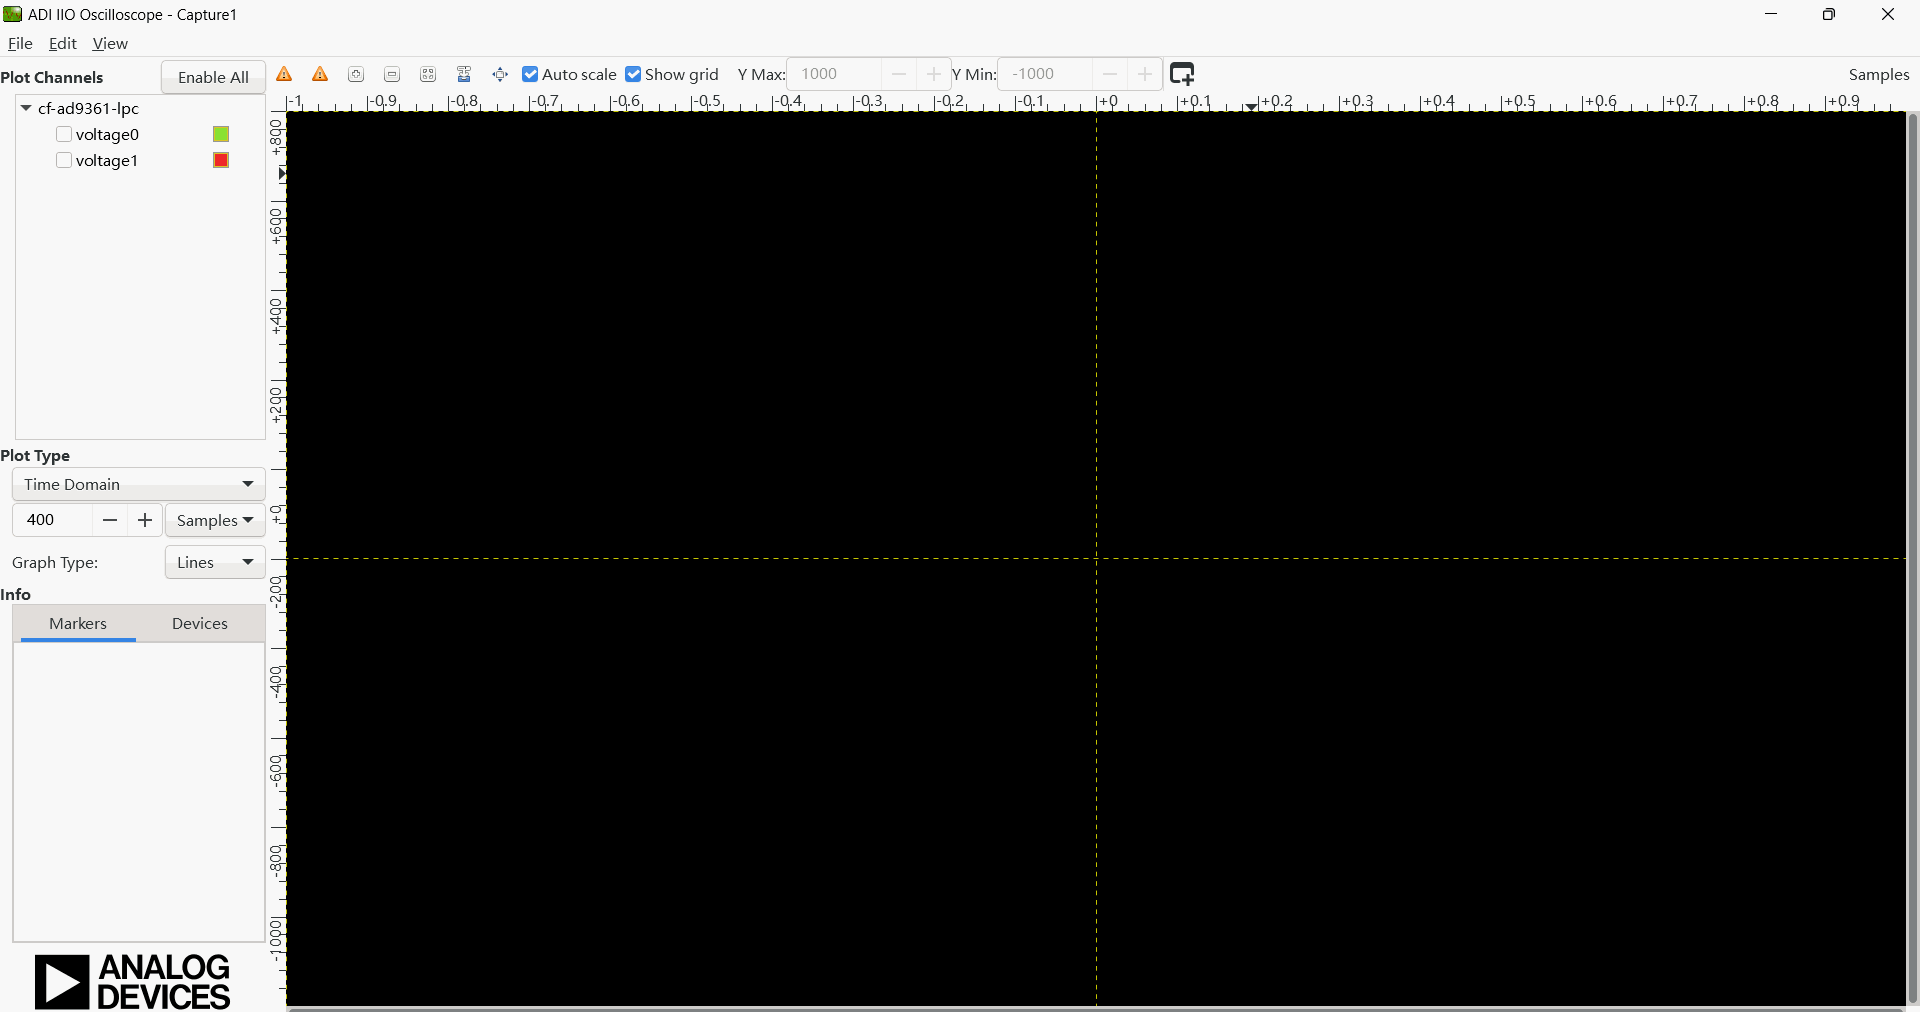
SDR# Installation and Test
SDR# (SDRSharp) is a popular software-defined radio receiver for Windows. It works with the GeekRF One through the PlutoSDR plugin. To use SDR#, the GeekRF One must run from the on-board flash without a TF card (see Flash the On-board Firmware). Connect the OTG port.
Install SDR# and the PlutoSDR plugin
- Download the PlutoSDR plugin
sdrsharp-plutosdr-0.5.4.zipfrom https://github.com/Manawyrm/sdrsharp-plutosdr/releases. - Download the x86 version of SDR# that the plugin page links to: https://airspy.com/downloads/sdrsharp-x86-noskin.zip.
- Unzip both files into separate folders, then copy all files from the plugin folder into the SDR# folder and replace the existing files.
- Open
FrontEnds.xmlin the SDR# folder with Notepad, add the following line directly above</frontendPlugins>, and save the file:<add key="PlutoSDR" value="SDRSharp.PlutoSDR.PlutoSDRIO,SDRSharp.PlutoSDR" /> - Double-click
SDRSharp.exeto start the program.
Receive FM broadcasts with SDR#
- Connect an antenna to the RX1 port.
- In the Source list at the top left, select PlutoSDR. If the GeekRF One is not listed, the plugin files were probably not copied completely, or the SDR# version does not match the plugin; download both again from the links above.
- Click the configure button next to the source. Set the URI (connection string) to
usb:for a USB connection, or toip:192.168.2.1to use the network address of the PlutoSDR firmware over USB. Set Sample Rate to 4 MSPS. - Enter the frequency of a local FM station, for example 103.9 MHz. In the Radio panel select WFM and set the bandwidth to 200000 (200 kHz).
- Click the play button. If the signal is weak, increase the gain. You should hear the broadcast.
SDRangel Installation and Test
SDRangel is an open-source SDR application with many demodulators and analysers. It supports the PlutoSDR and therefore the GeekRF One. Use the same setup as for SDR#: the on-board flash firmware and a USB cable to the OTG port.
Install SDRangel
- Download the Windows installer from the SDRangel releases page: https://github.com/f4exb/sdrangel/releases
- Right-click the installer and select Run as administrator. If User Account Control asks whether to allow the app to make changes to your device, click Yes.
- In the installation wizard click Next, accept the licence agreement and click Install.
Receive FM broadcasts with SDRangel
- Connect an antenna to the RX1 port.
- Start SDRangel. In the empty workspace, click the Add Receiver icon and select PlutoSDR from the list.
- In the device settings, set the sample rate to about 2.5 MS/s and the center frequency to a local FM station, for example 103.9 MHz. Click the play button to start the device. The spectrum and the waterfall are displayed.
- Click Add Channel and select Broadcast FM Demodulator. Adjust the channel settings if needed; you should hear the FM broadcast through your speakers.
Ubuntu Tutorial
Ubuntu Installation
You can use Ubuntu on a physical computer or in a virtual machine. A virtual machine is recommended because it makes debugging easier.
- To use a virtual machine, install a virtualisation program such as VMware Workstation Pro.
- Install Ubuntu 22.04 LTS (the current long-term support version at the time of writing): https://ubuntu.com/tutorials/install-ubuntu-desktop
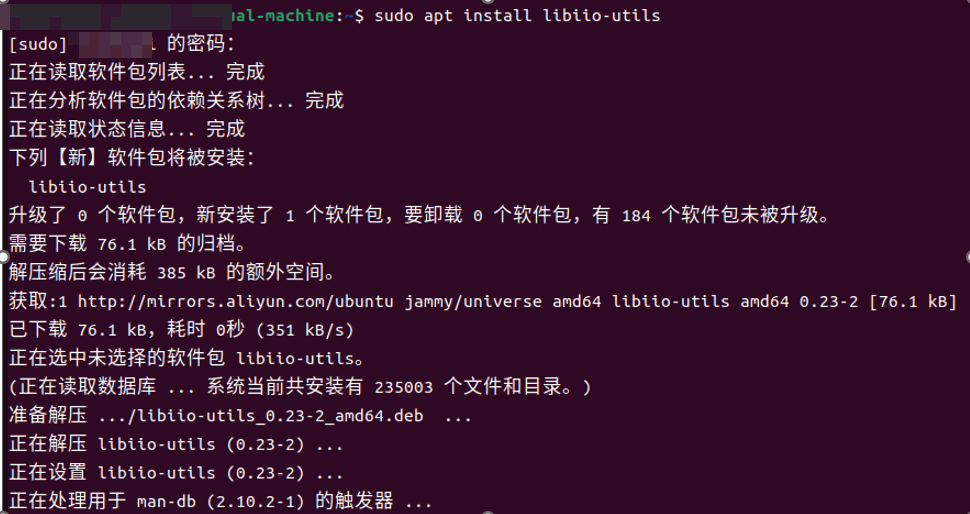
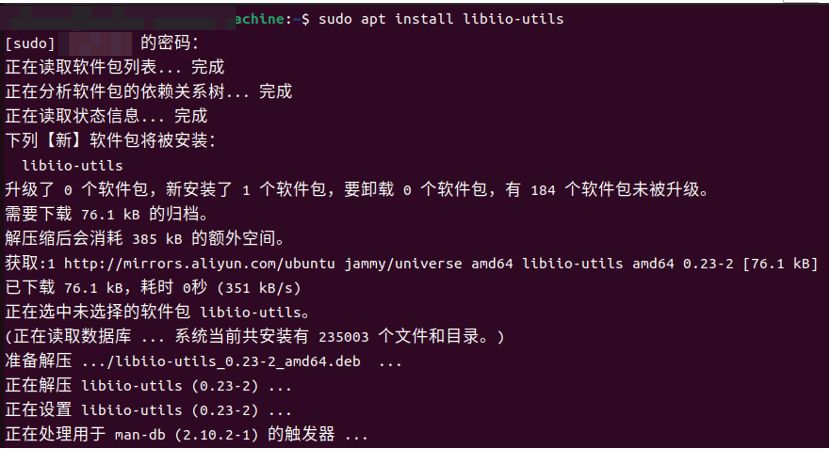
- Install GNU Radio and the libiio tools:
sudo apt-get install gnuradio
sudo apt-get install libiio-utils
libiio Installation and Test (USB connection)
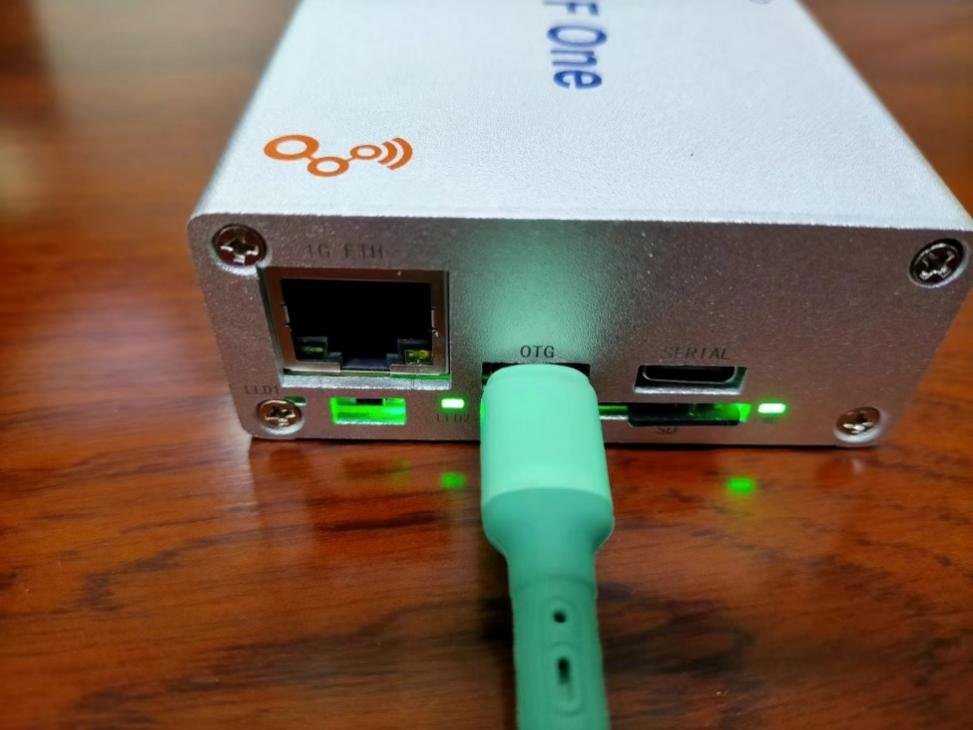
- Connect the OTG port of the GeekRF One to the computer with a USB Type-C cable.
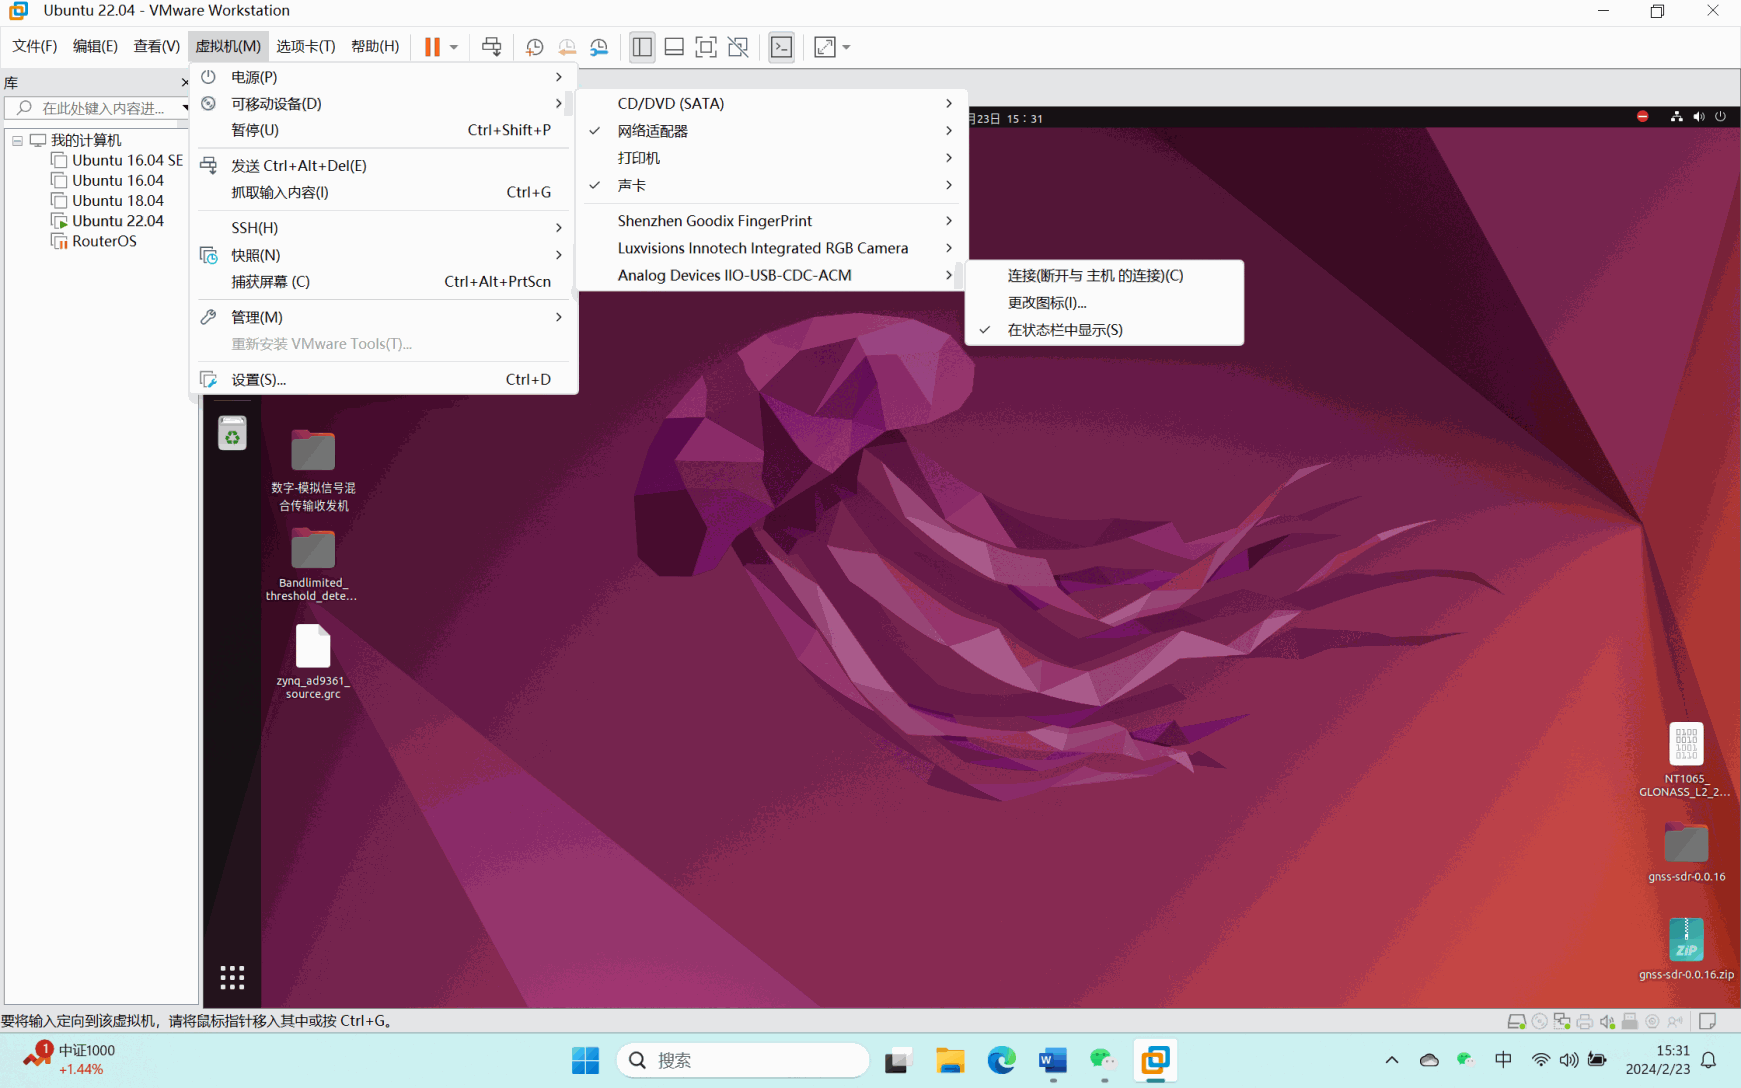
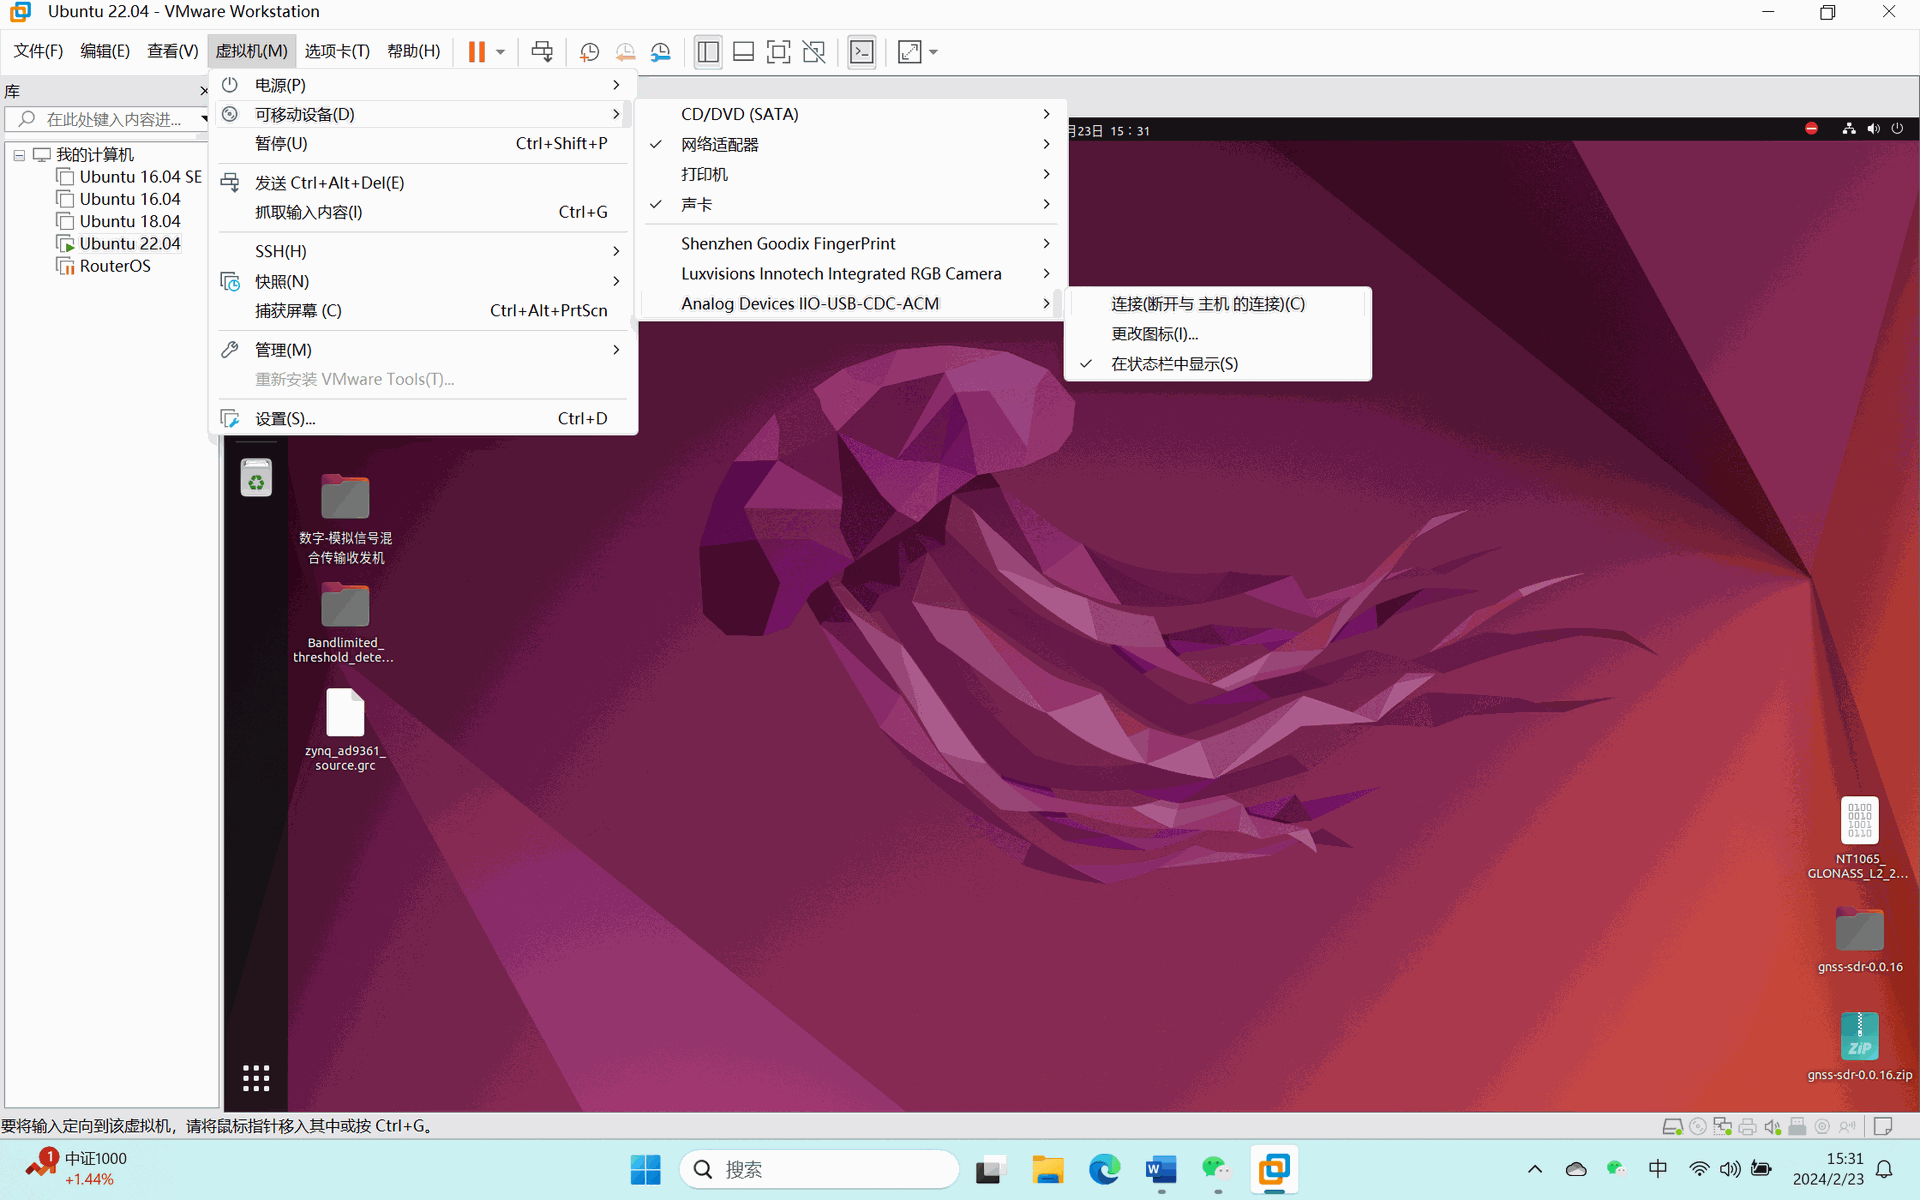
- If you use a virtual machine, connect the GeekRF One to the virtual machine, as shown in the following figure:
- Enter
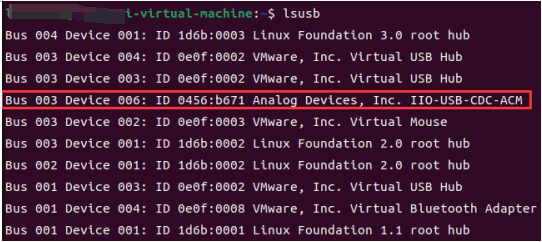
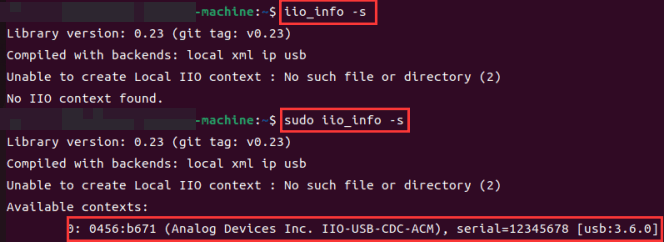
lsusbin the terminal. An Analog Devices device in the list shows that Ubuntu is connected to the GeekRF One.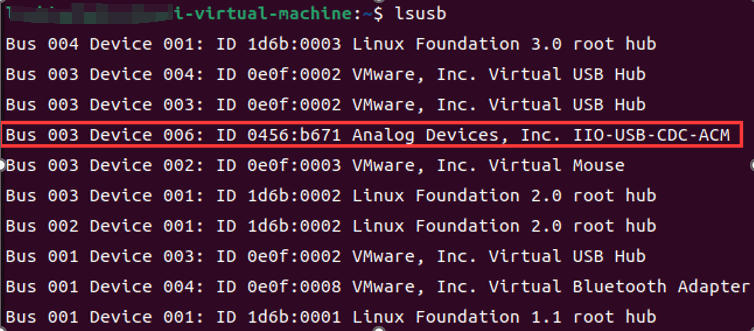
- Enter
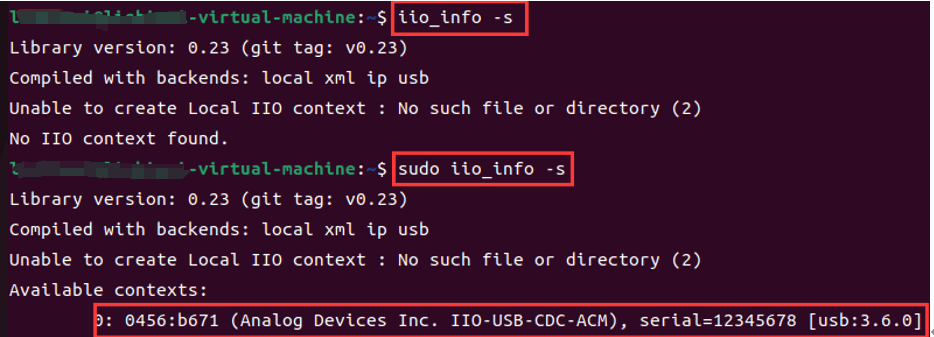
sudo iio_info -sto find the USB address of the device. In this example it isusb:3.6.0.Note: this command needs sudo. Without sufficient permissions the device is not found.
GNU Radio Installation and Test
Test the communication and data transfer with GNU Radio in the same way as under Windows (see GNU Radio Installation and Test). Start GNU Radio Companion with sudo, for the reason given in the note above:
sudo gnuradio-companionEthernet Connection Test
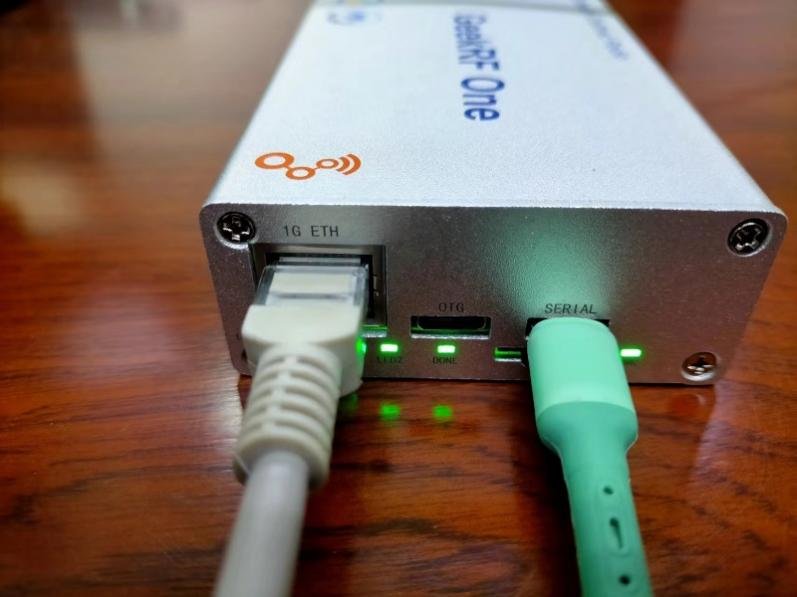
- Connect the GeekRF One to the computer with a Gigabit Ethernet cable, and connect a USB Type-C cable to the Serial connector.
- Set a static IP address on the GeekRF One. Open the Linux console in PuTTY and open the network configuration file:
sudo vi /etc/network/interfaces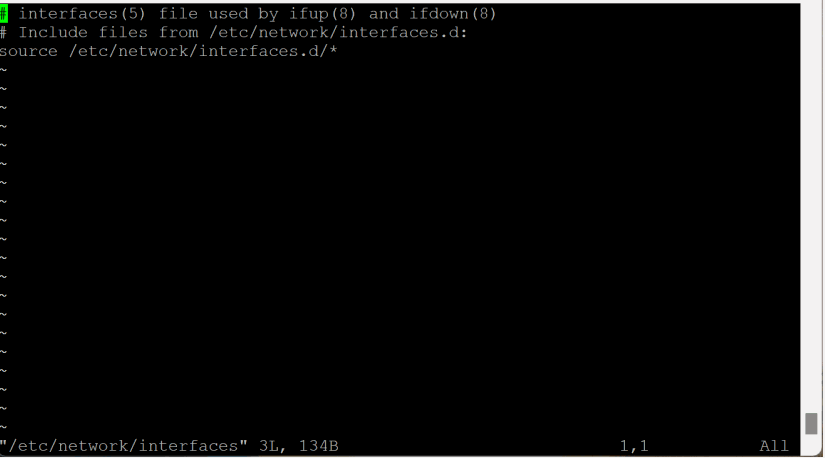
Press i to edit the file and change it as shown in the following figure:
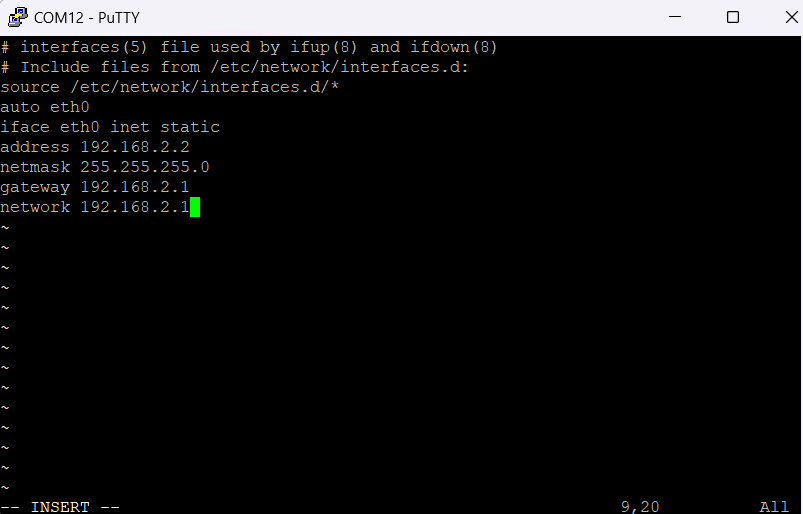
Press Esc, enter
:wqand press Enter to save the file and exit. The device uses the static address after the next restart.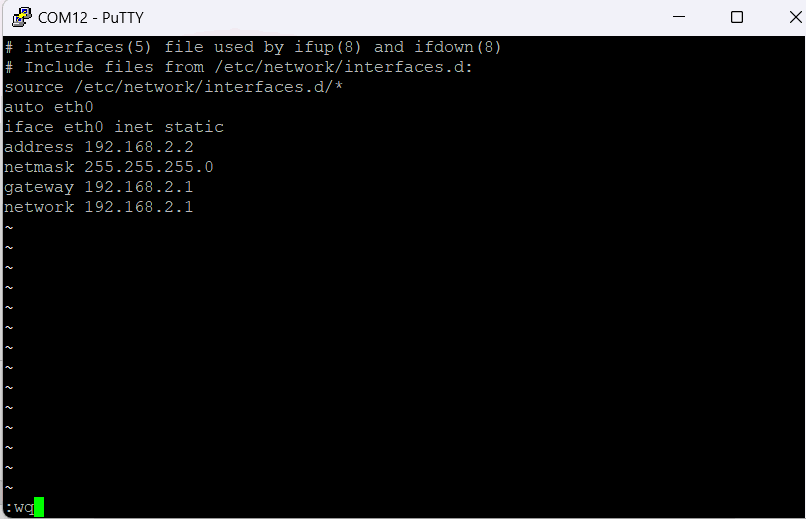
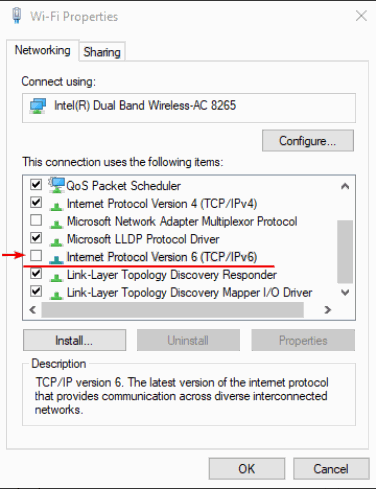
- When the device uses a static IPv4 address, disable IPv6 on the computer's Ethernet adapter (see Appendix A). Otherwise the computer, and IIO Oscilloscope, keep connecting over IPv6. Then restart the network adapter, for example by disabling and enabling it.
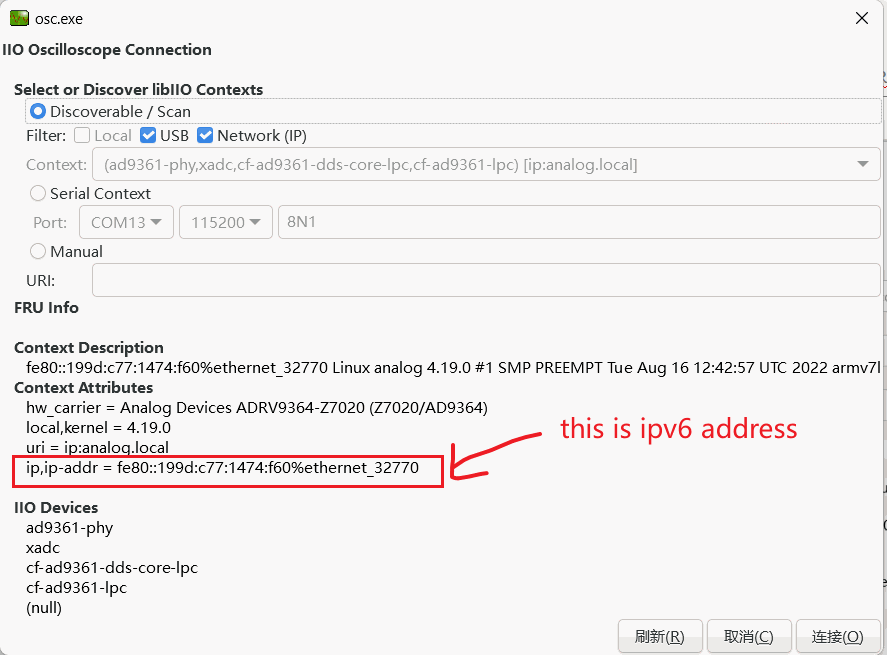
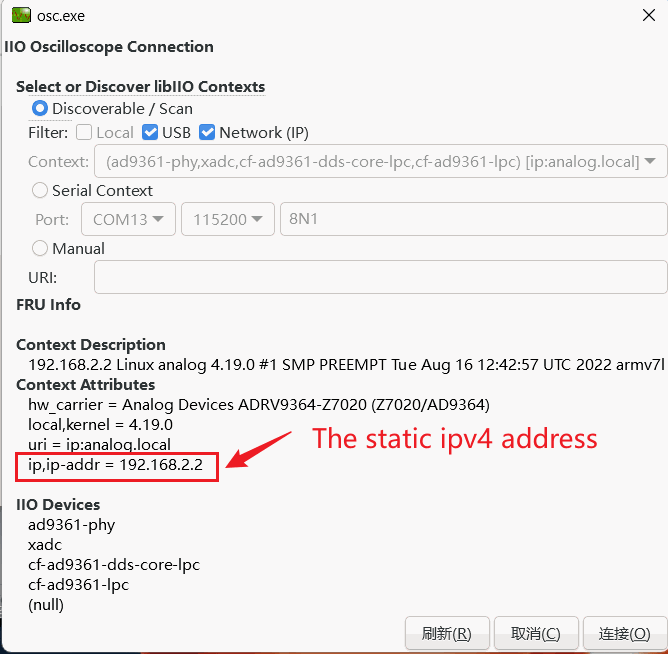
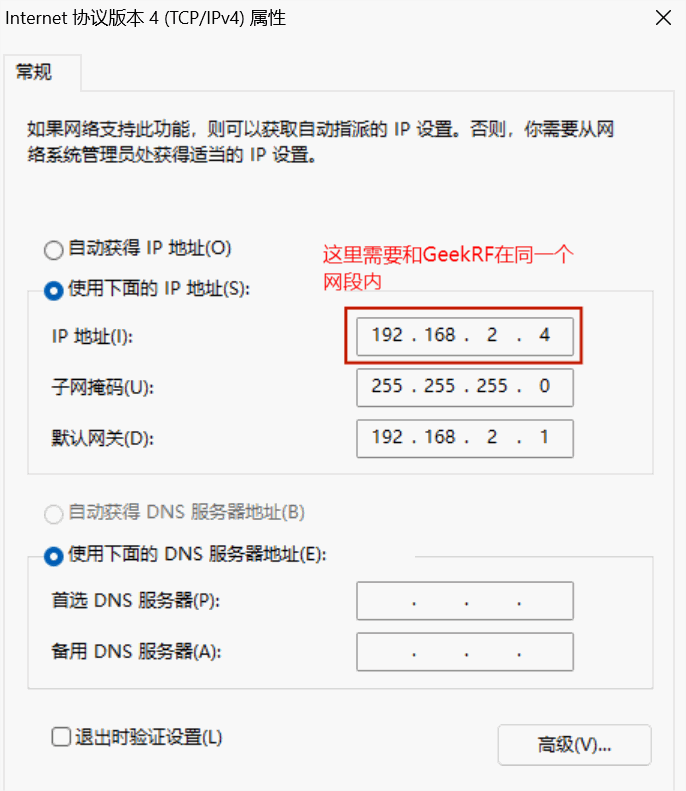
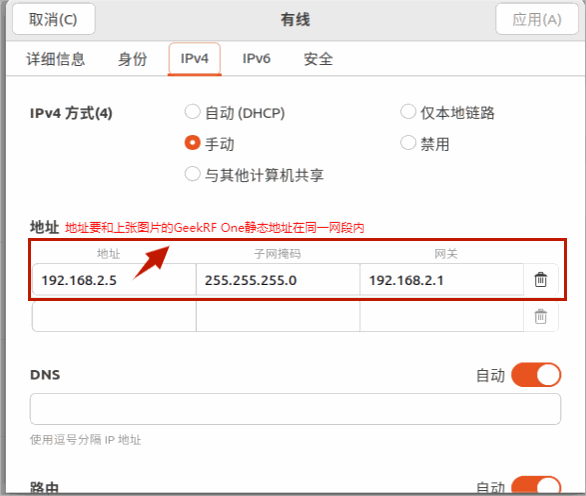
- On the computer (Windows, or the Ubuntu virtual machine), set the IP address, netmask and gateway as shown in the following figures. The computer must be in the same subnet as the GeekRF One (192.168.2.x in this example):
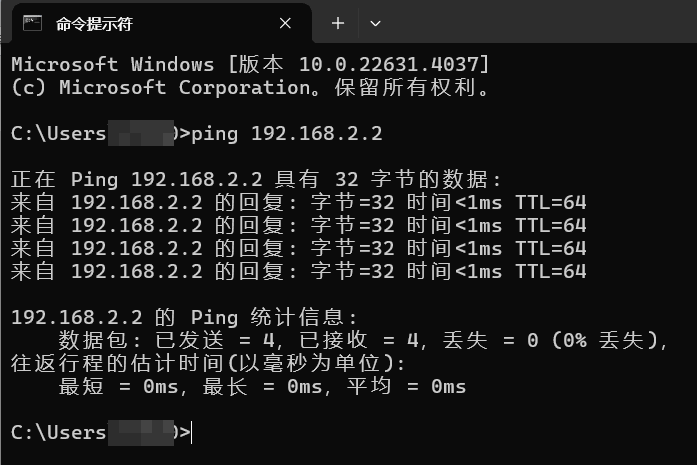
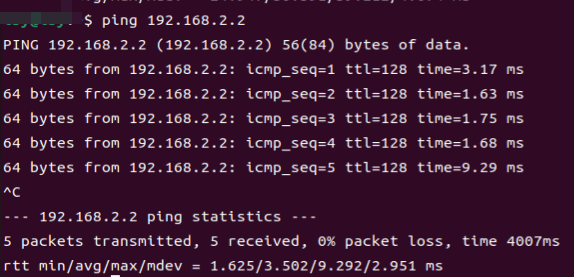
- Check the network connection between the GeekRF One and the computer:
Appendix A: Disable IPv6 on Windows
Windows 7, 8.1 and 10
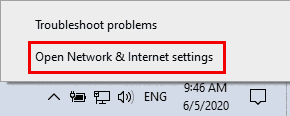
- Right-click the network icon in the notification area and select Open Network & Internet settings.
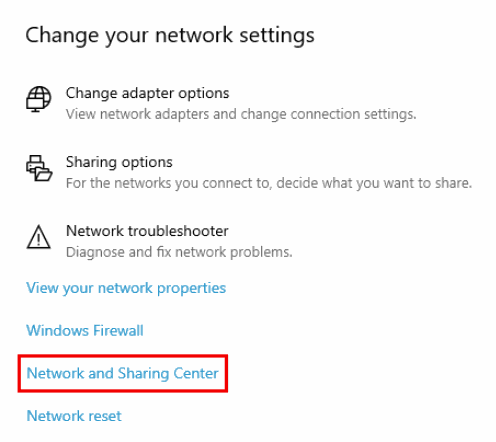
- Open Network and Sharing Center.
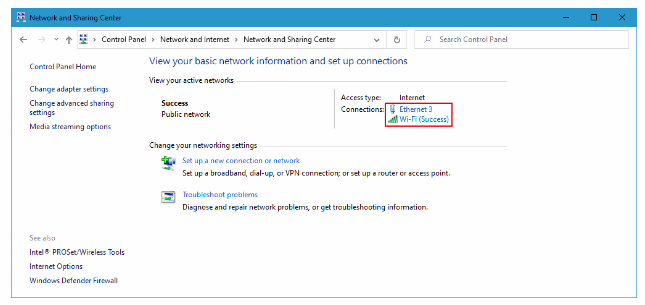
- Click your network adapter. To find the right adapter, unplug and plug in the network cable and see which adapter changes.
- Click Properties.
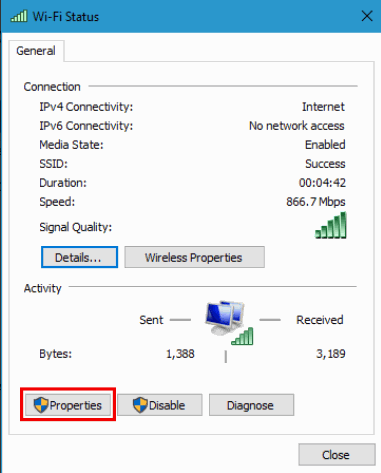
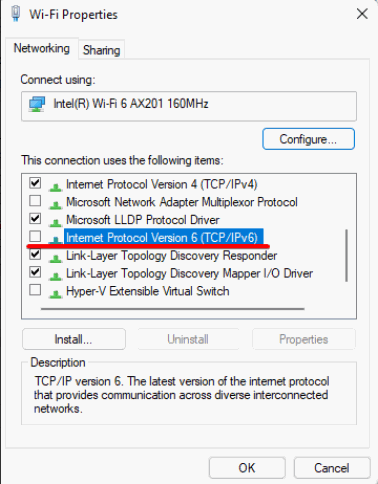
- Clear Internet Protocol Version 6 (TCP/IPv6), then click OK and Close.
Windows 11
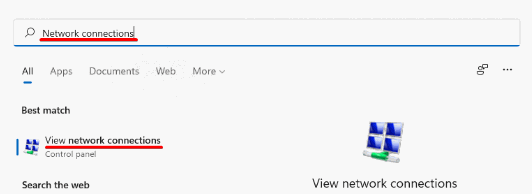
- Click the search (magnifying glass) icon on the taskbar.

- Type Network Connections and open the matching result.
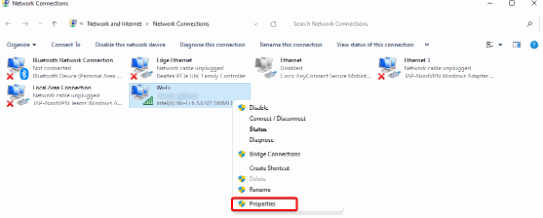
- Right-click your network adapter and click Properties.
- Clear Internet Protocol Version 6 (TCP/IPv6), then click OK and Close.